Purpose of chapter: to list - in alphabetic order - a copy of all Help pages built into the App.
Local TOC
Overview
To not unnecessary clutter text in other chapters with too many screenshots, they are collected here. Consider this chapter an appendix.
All Help pages are shown in the same way here, as they display on your device (iPhone or iPad), except for size.
AllHelps mainpage Help pages
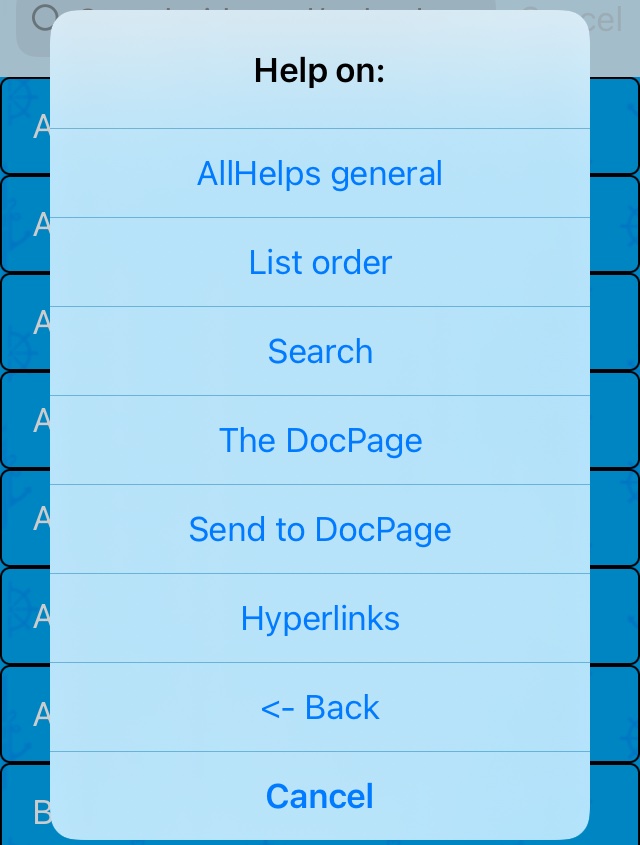
Are opened from the AllHelps Options Menu - a tap on its action opens:
Micro TOC
AllHelps mainpage: AllHelps general
Purpose of page: to list titles of help pages and give access to their content.
AllHelps is the last of five mainpages, selectable from the bottom tab bar icon .
It displays a list of titles of help pages.
Each is in context of a specific page (screen) in the App, from where it's accessible from an item in its Help on: menu.
Titles contain one colon and have two parts:
- main part ending with colon, e.g. AllHelps mainpage:
- minor part, e.g. AllHelps general
The scope of (number of items in) the list depends on content of the Search textfield at top of the page - as well as search settings.
When the Search textfield is blank, all help pages are listed.
Each list item has a title text, followed by a number of seach hits (blank when the Search textfield is blank). Just tap an item to show a whole help page in the DocPage.
Number of search hits for an item is sum of hits in its title and body, or only one of these, in accordance with Scopebar button tapped.
To scroll to top (if not already there): tap the in the nav.bar of the AllHelps mainpage.
AllHelps mainpage: List order
Items in the list are sorted on title main part. If more items with same main part occurs, their mutual order is as they appear in the Help on: menu of the page, to which they relate.
I.e. items are not ordered by minor part.
Example: if the Search textfield contains AllHelps mainpage: and Title in the Scopebar is tapped, the list displays:
- AllHelps mainpage: AllHelps general
- AllHelps mainpage: List order
- AllHelps mainpage: Search
- AllHelps mainpage: The DocPage
- AllHelps mainpage: Send to DocPage
- AllHelps mainpage: Hyperlinks
- which is obviously not alphabetic ordered, but as they appear in the AllHelps Help on: menu.
AllHelps mainpage: Search
To do a search:
- tap the Search textfield
- enter a search argument
- optional: tap Both or Title or Body in the Scopebar
- tap Search or Enter on the keyboard
Or, to exit: tap Cancel once or twice.
The AllHelps Options menu has two checkboxes:
- Case sensitive search
- Whole words search
- to activate / deactivate one or both options.
Their state is NOT saved when the App closes, i.e. they are OFF each time the App opens.
The Scopebar is dark blue when one is / both are activated.
Example: to list all help pages relating to the Tracklist page:
- enter Tracklist: in the Search textfield
- tap the Title button in the Scopebar
- tap Search or Enter on the keyboard
The description in the Tracklist: Search help page is very similar to the current description - though AllHelps is always in seach mode, even when the Search textfield is blank (giving a complete list of help pages).
AllHelps mainpage: The DocPage
When an item in the AllHelps page is tapped, the corresponding help page is shown in its whole in a pinchable (zoomable) web-like page, with page heading DocPage.
If a search was done in advance, all hits are then highlighted. The number of highlights equals the counter in the AllHelps page.
Unless the AllHelps Option menu Suppress highlighting checkbox is marked.
Else, hightligting of search hits in title and body of an item, or only one of these, is in accordance with the Scopebar button tapped.
In the DocPage, tap the button (UpArrow in Square) in the nav.bar to open a Select output medium Menu.
Or tap to return to the AllHelps page.
The DocPage is used by other pages, with other page headings:
- News (Track mainpage - Track Options: What's New in This version)
- Trackreport
On an iPhone this page changes to landscape when the device is rotated.
AllHelps mainpage: Send to DocPage
The button (UpArrow in Circle) in the nav.bar sends whole help pages for all items currently displayed in the AllHelps list, to the DocPage.
They are shown in same order as in AllHelps, with a separator bar between items with different content in Main part of ther titles.
Example: to list all help pages relating to the Tracklist page in their whole:
- enter Tracklist: in the Search textfield
- tap the Title button in the Scopebar
- tap Search or Enter on the keyboard
- tap the button.
Or, to exit: tap Cancel once or twice.
The button is disabled if the AllHelps list is empty. It's also disabled from when the Search textfield is entered till it's exited either by tapping the Cancel button, or the Search or Enter on the keyboard.
AllHelps mainpage: Hyperlinks
Some DocPages contain external links to the outside world, They have special color - like Beaufort scale convention - and open a browser window.
Return by tapping the Safari nav.bar button / text.
Many DocPages have internal links to other DocPages - like Windforces Picker - which by the way also contains the external link above.
Each time an internal link is tapped, another DocPage opens on top, and an exclamation mark is appended to the nav.bar button, i.e. it changes to:
- on first tap
- on second tap
- - and so on
Tap / / ... as many times as internal links were tapped, to return to the DocPage originally opened by AllHelps.
Or dismiss each DocPage by pulling it down the same number of times, unless Full screen is selected.
Alternatively, tap the DocPage nav.bar icon to dismiss all DocPages in the view stack, and return to AllHelps.
Highlighting does not occur in DocPages opened by internal links.
Barchart Help pages
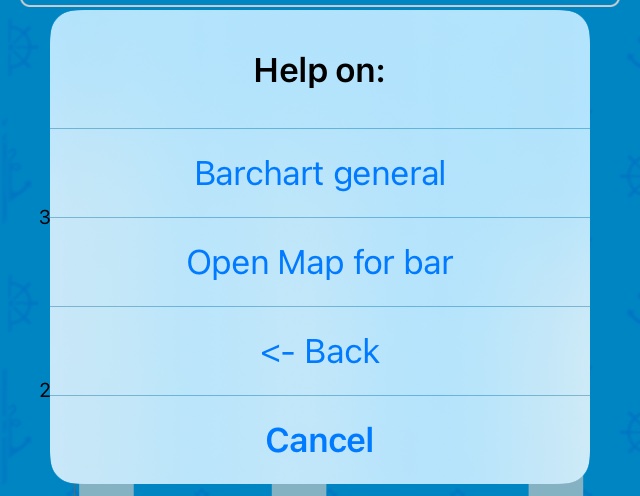
Are opened from the Barchart Options Menu - a tap on its action opens:
Micro TOC
Barchart: Barchart general
Purpose of page: analysis of the metrics of tracked plots from current and historic tracks, based on temporal distribution.
It opens from:
| Ref: | Page: | Action: |
|---|---|---|
| a) | Track mainpage | in Action on Current track? menu |
| b) | Tracklist | in Action on Historic track? menu |
| c) | History mainpage | in Action on Historic tracks? menu |
Plotting is independent of event registration (sail, weather and sea conditions). Therefore feeding data to the Barchart requires no special effort from your side, except doing some tracking.
A Metric picker controls What to show:
- Distance
- Average speed
- Max speed
A Granularity picker controls How to show:
- Daily
- 1 bar
- 2 bars
- 4 bars
- 8 bars
- 16 bars
- 32 bars
- 64 bars
- 128 bars
The Daily option applies only when opened from c).
Calculation rules:
When opened from a) and b), the timerange is implicitly Elapsed time of the given track.
When opened from c), the timerange is specified with the datepickers and used to fetch plots (aka locations) within it.
In c), Date+clock mode can be set for precise specification - calculations and display of time are based on seconds.
As Notes have no temporal extent, they are excluded.
Barchart: Open Map for bar
The Barchart Options menu action is enabled:
- when a Bar is tapped (selected)
- and that bar represents at least two plots (minimum needed to draw a Track section)
It works in tandem with the nav.bar icon.
When tapped, the Map opens to display the Track section(s) represented by the Bar selected.
When the nav.bar icon is disabled (dimmed), the reason why is appended to the (likewise disabled) menu action as:
- (tap a bar first)
- (too few plots)
- (no plots)
Blowup Help pages
Are opened from the Blowup Options Menu - a tap on its action opens:
Micro TOC
Blowup: Blowup general
Purpose of page: to enable examination of photos.
It opens from:
| Page: | Action: |
|---|---|
| Photo | in Action on Photo? menu |
| Photo | in Photo Options menu |
| Eventlist | in Action on Event? menu |
| Map | in Action on Event? menu |
| Event editor | in Photo Options menu |
On open, the photo selected - or being on the Photo Clb - is shown in full.
Two or more photos may be in scope: swipe or use the and buttons to browse - possibly across tracks/notes (owners of individual photos).
Tap for info on:
- title and departure time of owner item
- when the photo was shot
Double-tap or pinch to zoom-in / -out.
Drag to pan (move) after a zoom-in.
When opened from the Photo page, the same photos are browsable as in the Photo page.
On an iPhone this page changes to landscape when the device is rotated.
In this mode, the navigation bar - with its browse + buttons - is hidden until your device is near horizontal.
Crew+Boardings Help pages
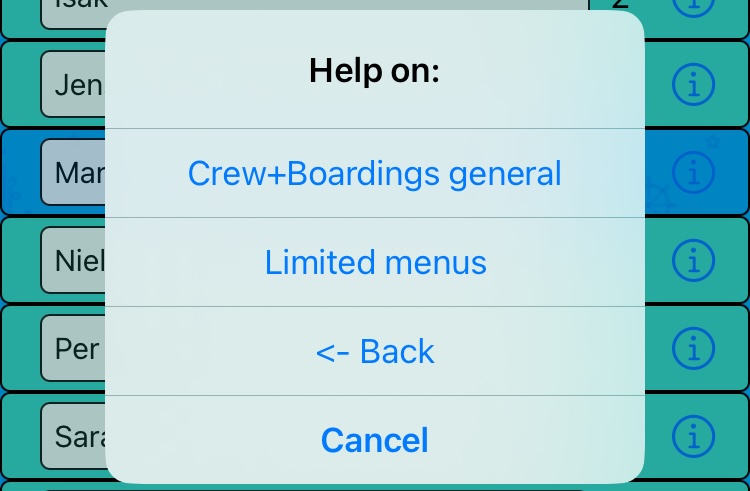
Are opened from the Crew+Boardings Options Menu - a tap on its action opens:
Micro TOC
Crew+Boardings: Crew+Boardings general
Purpose of page: to enable creation and management of Crewmembers and their Boardings.
Boardings constitute a list. Each of its items:
- filters all History mainpage outputs
- combines with its other filters
They help answer questions like:
- when did our daughter in law cruise with us?
- who is our most eager hand?
The page opens from:
| Page: | Action: |
|---|---|
| Track mainpage | in Action on Current track? menu |
| Tracklist | in Action on Historic track? menu |
| History mainpage (Limited menus) |
in History Options menu tapping an item in the Boarders Filter (when Boarder(s) have been created) |
A crewmember is a person that have boarded zero or more cruises.
Crewmembers are created with in the Options menu.
A crewmember is deleted by a left swipe - thereby also removing (unboarding) any of his/her boardings.
A boarding is the act of associating a crewmember with a track (or note).
A boarder is a crewmember that have boarded one or more tracks/notes. The persons name appears in the Boarders Filter.
Boardings are made with in the Action menu. When the first of a persons boardings is made, then he/she becomes a 'boarder' and hence will appear in the Boarders filter.
A boarding is removed with in the Action menu. When the last of a persons boardings is removed, then he/she is no longer a 'boarder' and hence will disappear from the Boarders filter.
Crewmembers are listed in alphabetic order. Each line shows:
- the persons name
- total number of boardings
- a Disclosure button ('i' in a circle) to open the Action on Crewmember menu
If a Disclosure button seems dead, tap it again!.
The color scheme below applies:
| Light mode: | Dark mode: | Person has: |
|---|---|---|
| lime | grey | boarded this track or note |
| turquoise | darkgrey | other boardings |
| teal blue | black | no boardings |
The Options menu action copies boardings of the track or note, that comes just before (is older than) what's being processed. It's enabled if:
- no boardings have already been done
- an older item does exist
- such item has one or more boardings
It cooperates with TrackSet: Copy earlier boardings on start Switch.
Crew+Boardings: Limited menus
When opened from the History mainpage, both Options and Action menus are limited, i.e. have fewer actions:
- the Options menu only has the action
- the Action menu only has the action
A crewmember can still be deleted by a left swipe - thereby also deleting any of his/her boardings. The Boarders filter is then affected only when deleting or renaming a person with boarding(s).
New boardings - and hence 'boarders' - can only be created from the other openers:
Dictaphone Help pages
Are opened from the Dictaphone Options Menu - a tap on its action opens:
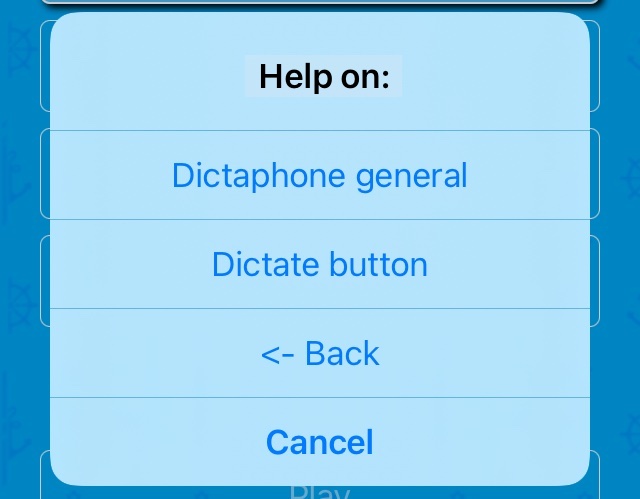
Micro TOC
Dictaphone: Dictaphone general
Purpose of page: to enable voice recording with the Microphone.
It opens from:
| Page: | Action: |
|---|---|
| Voice | in Voice Options menu |
| Track mainpage | Dictate button |
Tab Record for voice recording in AAC (Advanced Audio Coding) format.
A low sampling rate of 12 kHz ensures moderate space usage. A one minute item consumes approx. 230 KB of space in Backup files (and a little less in the App DB)
Tapping saves and attached a voice to the track (or note) from which Dictaphone was opened. Also, a action is done (see Photo: Voice Options submenu).
Enter its title here, before - or later, in the Voice page.
The Signal start/stop rec. checkbox controls if a short upward / downward going sound is given just before a recording starts / after it stops.
The Stay open on Done? checkbox determines if this page stays open after tapping .
Dictaphone: Dictate button
The Dictate button in the Track mainpage shortcuts to Dictaphone when tracking / making notes.
It's a companion to the action in Voice Options menu in the Voice page.
When making a note, Dictaphone simply adds voice(s).
When making a track, Dictaphone checks if a photo was shot within the last 60 seconds after tapping Dictate .
If so, tapping :
- adds a voice to the track
- autolinks that photo to the voice
If more recordings are done in a Stay open Dictaphone, only #1 is linked to.
Otherwise, tapping :
- adds a voice to the track
- makes a plot (requires you to move)
- attaches an Autogen.event to it
- links this event to the voice
- making a yellow Map voice eventpin (see MapSet: Show eventpins Picker).
Event editor Help pages
Are opened from the New event Options Menu - a tap on its action opens:
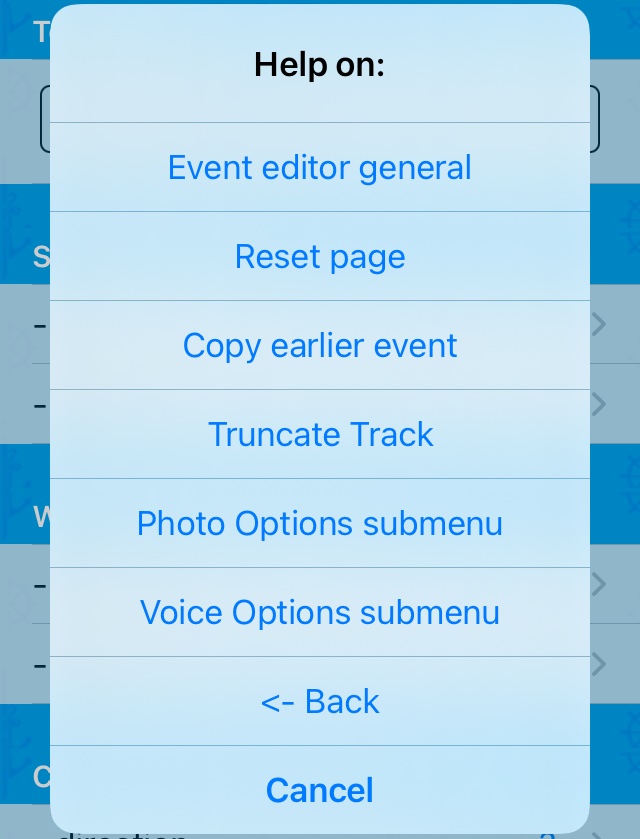
Micro TOC
Event editor: Event editor general
Purpose of page: to enable display and maintance of Events.
It opens from:
| Page: | Action: |
|---|---|
| Track mainpage | New event button |
| Map | in Action on Event? menu |
| Eventlist | Disclosure button |
Use this editor to display and change:
- the Text-note field
- the 10 attributes (organized in 5 sets)
The two sets Wind direction and force and Current direction and force are connected sets - i.e. the attributes are related. For example: you must set a wind direction after setting a wind force - and vice versa.
The value of an attribute is set or changed by tapping a line in the editor and then selecting an option from the corresponding pickerscreen.
Tap to save changes and exit.
Tap the button (upper left corner) to exit or cancel changes.
Event editor: Reset page
This action resets the page to as when opened.
It's enabled when changes have been done.
Event editor: Copy earlier event
This action copies the earlier event (i.e. the until then last event).
Can be practical when making (manual) events where e.g. wind dir. or force changes slightly.
It's enabled for New events only.
Event editor: Truncate Track
This action truncates a track after the event, for which the action was applied.
Use it in situations where tracking proceeded longer than intended, e.g. because the ending procedure was forgotten or not done at arrival.
Checkout TrackSet: AutoEnd timetrigger Picker.
Work flow:
- from the History mainpage, open Tracklist
- for the track in question, open the Map
- use the Show eventpins Picker and select the All (slowest) option
- locate where you want to truncate (cut off)
- if needed, create an XtraEvent here
- tap the eventpin in question to open its Callout popup
- tap the Disclosure button ('i' in a circle) to the right
- tap the action
- tap the in the nav.bar
- tap the action
If a Disclosure button seems dead, tap it again!.
If ok, statistics before truncation is shown in a dialog. You must confirm continuation.
Preconditions for the action to be enabled:
- the Event editor must open from Map via Tracklist
- applies to events for Tracks only
- applies to intermediate events only (i.e. not to first or last event)
- any other changes must be saved first
Furthermore, no photo(s) and / or voice(s) relating to the part of the track to be truncated may exist. Such must be deleted manually (use the Photo / Voice pages).
After the Truncate Track action completes, it first closes the Event editor, then the Map, shortly visits the Tracklist, and then re-opens the Map. Should this sequence fail, manually re-open the Map for affirmation of correct truncation.
A Track has a number of subordinate Events, each attached via a Plot (aka location):
   Track ->
      Plot -> First plot Event
      Plot
      Plot -> XtraEvent
      Plot
      Plot -> Last plot Event
An XtraEvent is one kind of User Event. Applying truncation to it results in:
   Track ->
      Plot -> First plot Event
      Plot
      Plot -> Last plot Event *)
*) Exact Text-note is Last plot (after Truncate Track).
A truncation adjust these Track statistics:
| Promt | Meaning / remark |
|---|---|
| Arr | Arrival time, i.e. the time the last plot was done |
| Plots | Number of plots |
| Len | Tracklength |
| Elt | Elapsed Time, i.e. time from departure to current time / arrival |
| AvS | Average speed between first and last plot |
| Max | Maximal speed from GPS since start |
Event editor: Photo Options submenu
The links from events to photos are setup automatically by the Photo page action - unless Add Strategy Don't connect is selected.
If this automation isn't or can't be used (e.g. missing Metadata) or if it fails, use actions in this submenu to manage links manually, via the Photo Clipboard (short: Clb).
An action in the Photo options submenu may have a textual extension, and in some cases also be disabled, e.g.:
Paste from Photo Clb (empty)
| Extension: | Means: |
|---|---|
| (no link) | event has no linked photo |
| (empty) | Photo Clb is empty |
| (equal) | Photo Clb = linked voice |
| (replace) | update existing link to photo |
| (new) | insert new link in event |
Examine content of Photo Clb with the action.
Event editor: Voice Options submenu
Use actions in this submenu to manually manage links from events to voices, via the Voice Clipboard (short: Clb).
Apply a voice to an Autogen.event to supplement a photo (unless the photo itself is linked to a voice).
Or setup a link for a User event (one made by the New event button)
An action in the Voice options submenu may have a textual extension, and in some cases also be disabled, e.g.:
Paste from Photo Clb (empty)
| Extension: | Means: |
|---|---|
| (no link) | event has no linked photo |
| (empty) | Voice Clb is empty |
| (equal) | Voice Clb = linked voice |
| (replace) | update existing link to photo |
| (new) | insert new link in event |
Examine content of Voice Clb with the action.
Eventlist Help pages
Are opened from the Eventlist Options Menu - a tap on its action opens:
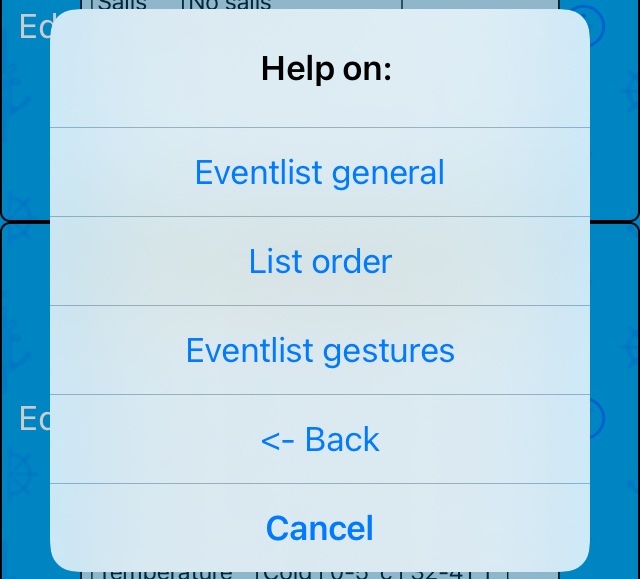
Micro TOC
Eventlist: Eventlist general
Purpose of page: to list events for a track or note, and give access to actions for individual items.
It opens from:
| Page: | Action: |
|---|---|
| Track mainpage | in Action on Current track? menu |
| Tracklist | in Action on Historic track? menu |
Its content is based on setting of Settings mainpage selection(s):
- Measurement picker
- Windforces picker
- Textsize picker
- English time designations switch
To scroll to top (if not already there): tap the in the nav.bar of the Eventlist.
Eventlist: Action on Event?
This menu opens by tapping the Disclosure button ('i' in a circle) in the right side of each list cell. The button opens a menu with actions to open:
- Map
- Event editor
- Blowup showing a linked photo
- Voice playing a linked recording
Eventlist: List order
The Eventlist Options menu has two radiobuttons:
- Order ascending: old first
- Order desc.: new first
To change the list order, simply tap the un-checked one.
Eventlist: Eventlist gestures
Each list cell represents a single event. Use these gestures and shortcut taps for a specific item:
| To: | Do this: |
|---|---|
| open Action menu | tap the Disclosure button ('i' in a circle) to the right |
| open Event editor | tap the Ed label to the left |
| scroll a page | tap, hold and drag left or right margin |
| scroll a long cell | drag inside the cell |
| delete an event | swipe left |
If a Disclosure button seems dead, tap it again!.
File+Subscr mainpage Help pages
Are opened from the File+Subscr Options Menu - a tap on its action opens:
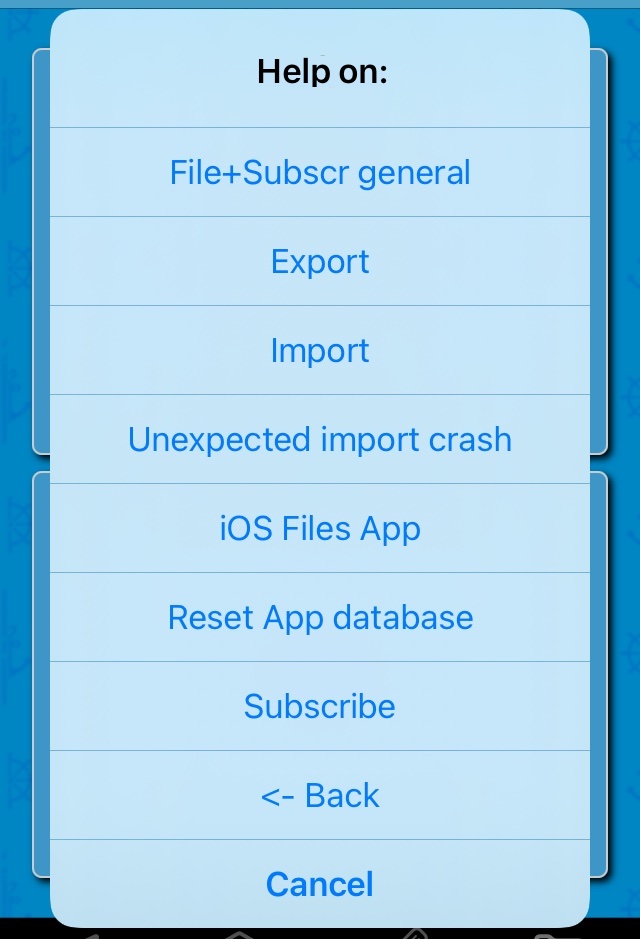
Micro TOC
File+Subscr mainpage: File+Subscr general
Purpose of page: to constitute a junction for File and Subscription related functions.
File+Subscr is fourth of five mainpages, selectable from the bottom tab bar icon .
It links to Backup file functions in:
For speciel needs, there is a Reset App database action .
The page also links to the Subscribe page - whithout relation to the above.
File+Subscr mainpage: Export
This page opens with statistics on the App database content.
Also shown is a summary of changes made since last export.
A Tap here to create a Backup file button is placed at the page bottom.
Use it when you you have done some tracking or changes!
Backup files are named slb_xxx.db, where slb stands for Sailor Logbook and xxx is creation time in the form yyyy-MM-dd HH:mm:ss.
They are placed in the Sailor Logbook folder which can be accessed with the standard iOS Files App.
Use that App to manually copy a Backup file to your iCloud drive, thus securing it and making it distributable to other devices.
File+Subscr mainpage: Import
This page opens like the Export page, with statistics and a summary of changes.
A Tap here to select a Backup file button opens a File selection dialog. When a file has been selected, a shallow validation of it is done.
If ok, statistics on the file is shown in a dialog. You must confirm continuation.
Next a deep validation is done, and the App database will be restored or initialized. This may take some time.
If the deep validation finds any issue, a Problem with Backup file dialog gives a diagnosis and some instructions. A Close App button is then the only option.
After tapping it, restart the App - and you will see that the App database is unchanged: no harm is done!
This is also true if the App is somehow interrupted before finish of Import.
File+Subscr mainpage: Unexpected import crash
Great care was taken implementing the Import deep validation.
If some unforeseen condition in a Backup file should exist anyway, the App will crash: neither diagnosis nor instructions are shown.
The App database is only updated after deep validation is completed successfully, i.e. it's unchanged after such crash. No harm is done!
To analyze a crash situation, we need the following information sent by mail:
- Sailor Logbook version
- a copy of the Backup file
If the file is too big to send by mail, contact our support to find another way of sending it.
Use the contact link at our frontpage.
File+Subscr mainpage: iOS Files App
Backup files live in the Sailor Logbook folder, which is part of the App and can be accessed with the standard iOS Files App.
After Export, open the Files App to copy a Backup file to your iCloud drive:
- tap the Browse icon (lower right)
- tap On My iPhone
- tap Sailor Logbook
- activate Select (upper right)
- tap the Backup file in question
- tap the folder icon (lower middle)
- tap iCloud Drive and then Copy
Before Import, open the Files App to copy a Backup file from your iCloud drive:
- tap the Browse icon (lower right)
- tap iCloud Drive
- activate Select (upper right)
- tap the Backup file in question
- tap the folder icon (lower middle)
- tap On My iPhone
- tap Sailor Logbook and then Copy
File+Subscr mainpage: Reset App database
This action resets all data and settings.
You must confirm the action twice.
When you restart the App, it looks like after a new installation.
This is useful if you are a new user and want to experiment and test the App out, before starting for real.
Safeguard yourself: do an Export first!
File+Subscr mainpage: Subscribe
This page shows scrollable info on Sailor Logbook auto-renewable subscriptions, and services provided during each period, specifying:
- periods
- services
- general info and links
- expiry
If you can confirm that you did read and do agree on this info, tap the Buy button at the page bottom to purchase a subscription.
If you think you have a subcription but it has become inactive, then before contacting Apple:
- try a restart of the App, or:
- tap the Restore button at page bottom
A Log button at page bottom opens a page with subscription history (if any).
GeoPlan Help pages
Are opened from the GeoPlan Options Menu - a tap on its action opens:
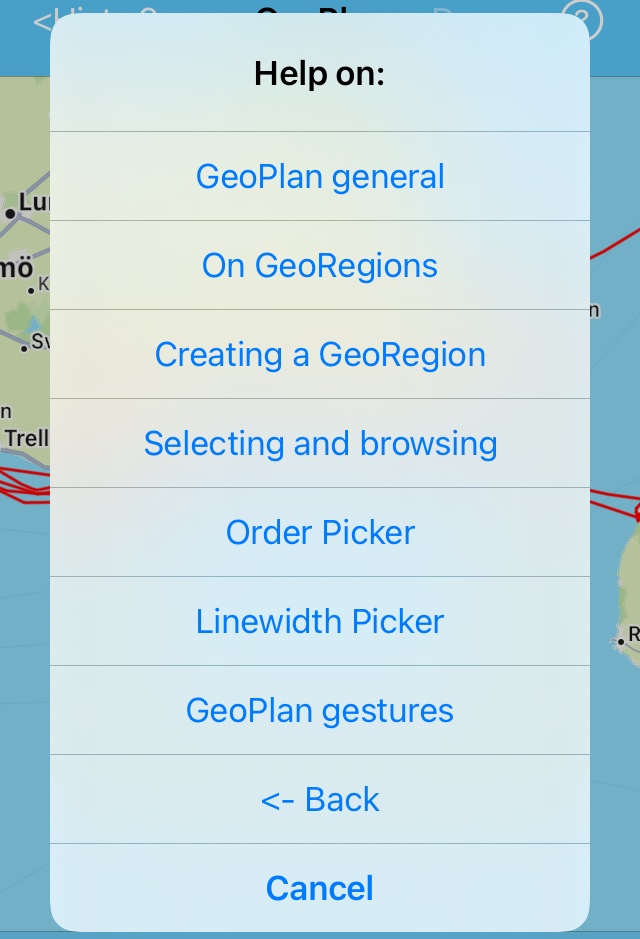
Micro TOC
GeoPlan: GeoPlan general
Purpose of page: to enable the creation, display and management of GeoRegions. And to display ALL tracks (a 'heatmap') in history, un-restricted by filter and timerange settings.
GeoRegions constitute a list. Each of its items:
- filters all History mainpage outputs
- combines with its other filters
They help answer questions like:
- when did we cruise Hawaii?
- how often did we visit Capri 2023?
The page opens from the Options menu in the History mainpage, or - when GeoRegion(s) have been created - by tapping an item in the GeoRegions Filter.
Actions in GeoPlan only affect the content (scroll list) of the GeoRegions Filter, and only after any changes are saved by tapping .
Selecting a new option in the Order Picker is considered 'a change'.
Data in History are unaffected by GeoPlan.
GeoPlan: On GeoRegions
GeoRegions are Geographic rectangles that (supplying other History mainpage filters) filters all its outputs.
Create any number of GeoRegions of almost any size. They constitute content (scroll list) of the GeoRegions Filter, in an order determined by the Order Picker.
When a GeoRegion is selected, it limits tracks to those visiting it, and notes to those registered within it.
GeoRegions are outlined with a black (in dark mode: white) rectangle, both in the Map and in the GeoPlan page.
In the latter, a selected GeoRegion is outlined with an orange rectangle, and a GeoRegion being planned while Creating a GeoRegion is outlined with an red, dotted rectangle.
GeoPlan: Creating a GeoRegion
Follow these steps:
- arrange the GeoPlan Map (move and zoom)
- start planning a GeoRegion by a first long-press (an orange pin occurs)
- rearrange the Map if needed
- end planning a GeoRegion by a second long-press (another orange pin occurs, and a red, dotted rectangle is outlined)
You then have these options:
- adjust the outline
- tap when the outline is ok (after creation, it will be selected)
- cancel planning by (a third) long-press
To adjust the outline, drag the orange pin(s):
- select it by tapping it (a Drag me annotation pops up)
- drag it to a new location: tap below the pin head (make it jump) and hold it, then drag and release it (exercise makes master!)
- (de-select by tapping the Map)
If the layout of a GeoRegion isn't ok, select it and either:
- tap to delete it, and:
- tap to start over
- or:
- plan another GeoRegion (as described above), and:
- tap to Replace Selected GeoRegion, i.e. to replace layout of the selected GeoRegion with layout of the planned one (the red, dotted outline)
Before a planned GeoRegion is accepted for creation (or replacement), a number of checks are done.
Firstly the layout is examined:
- sides of GeoRegion rectangles must have a minimum length of 100 meter
- and their aspect ratio (heigh / width) must be between 0.1 and 10
Next, coincidence is checked:
- Mutually, GeoRegions must be offset with a minimum of: 500 meter
- offset of two GeoRegions is max. of the distances btw their top-left and bottom-right corners respectively
- diagonal corners of two GeoRegions must not both (almost) coincide
Finally, a content investigation is done:
- a GeoRegion must contain (part of) one or more tracks, i.e. it must cover part of the 'heatmap'
- otherwise it would be useless
GeoPlan: Selecting and browsing
In the History mainpage, use the GeoRegions Filter scroll list to browse GeoRegions and select one (tap, hold, drag and release).
If you just tap an item in the list, GeoPlan opens with the given GeoRegion selected, or with none selected if the *GeoRegions* item was selected.
In the GeoPlan page - provided at least one GeoRegion has been created - to select a GeoRegion:
- arrange the GeoPlan Map (move and zoom), locate the GeoRegion and tap inside it
- or browse with the and the buttons
Tap inside an already selected GeoRegion for info on height/width and size. Tap outside all GeoRegion(s) to de-select and show all GeoRegions.
If you tap where two or more GeoRegions overlap, the by area smallest is selected.
GeoPlan: Order Picker
For specifying sort order of GeoRegions in GeoPlan and the GeoRegions Filter scroll list.
The picker options are:
- Name
- Latitude (S->N)
- Longitude (W->E)
- Area size
Latitude and Latitude evaluation is based on center of GeoRegions.
Selecting a new option enables the button.
GeoPlan: Linewidth Picker
For specifying width of lines drawn on maps.
The picker options are:
- Thin
- Medium
- Thick
The best choice is a matter of taste, device and Map composition.
The selected option is shared with:
GeoPlan: GeoPlan gestures
Gestures on a GeoPlan Map or a Map pin:
| To: | Do this: |
|---|---|
| move the Map | tap, hold and drag |
| zoom the Map in | double tap |
| zoom the Map in/out | two-finger pinch out/in |
| select a GeoRegion | tap inside it |
| de-select and show all GeoRegions | tap outside all GeoRegion(s) |
| start planning a GeoRegion | long-press 1.time |
| end planning a GeoRegion | long-press 2.time |
| cancel planning a GeoRegion | long-press 3.time |
| adjust while planning | tap a Map pin and drag |
| create a planned GeoRegion | see Creating a GeoRegion |
History mainpage Help pages
Are opened from the History Options Menu - a tap on its action opens:
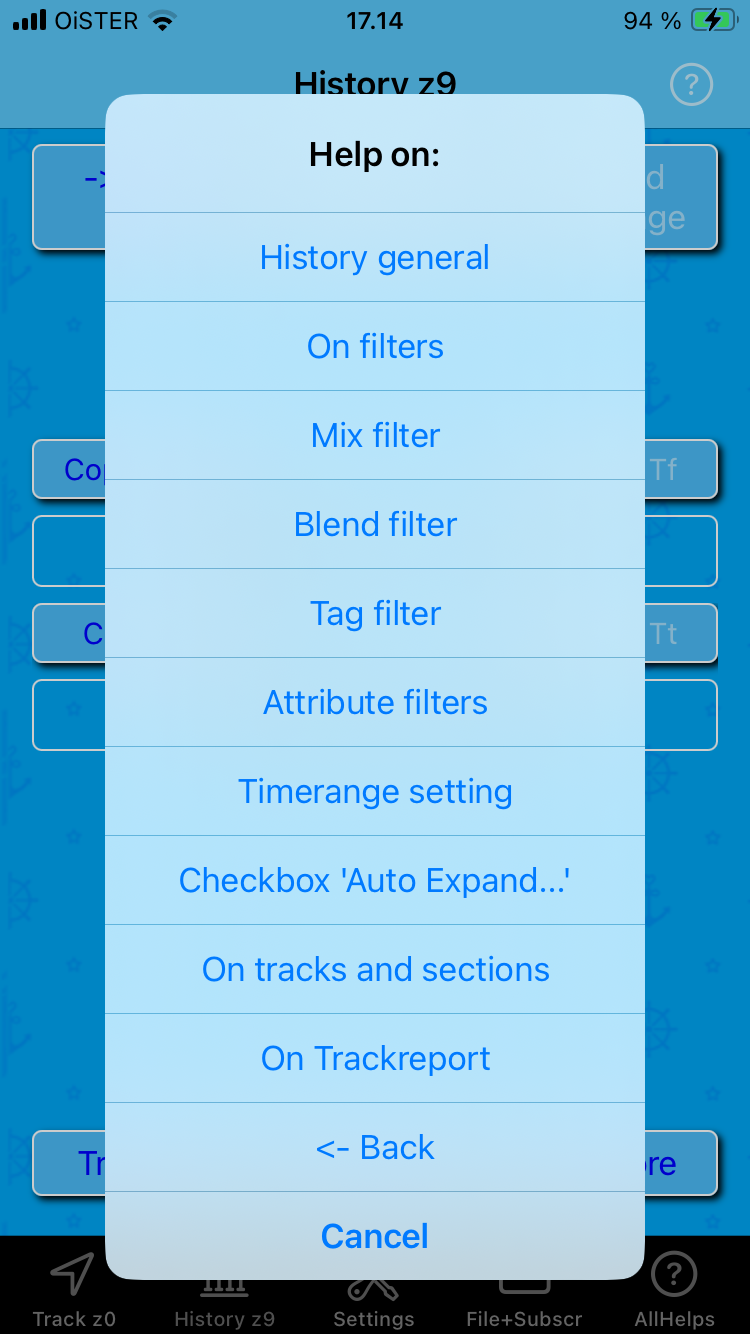
Micro TOC
History mainpage: History general
Purpose of page: to give access to historic tracks.
History is second of five mainpages, selectable from the bottom tab bar icon .
It gives access to (makes output of) what's tracked, based on:
- filter options (selections)
- timerange setting
The concept track also covers note.
Outputs for given options + timerange are made with buttons at the lower part of the page:
| Action: | Opens: |
|---|---|
| Tracklist | Tracklist |
| HistMap | Map |
| HistMore | Action on Historic tracks? menu |
Associate the prefix 'Hist' with 'Historic'.
Screen space is too limited for all actions to appear simultaneously. Thus some exist in a menu opened by the HistMore button ('Historic items, more actions'):
| (Sub)page |
|---|
| Trackreport |
| Barchart |
| Piechart |
| GPX mapfile *) |
| Photo |
| Voice |
| Mailcomposer |
*) Has no separate help page.
History mainpage: On filters
You can choose different filters to control volume and content of outputs. Each filter:
- is designed to limit the extent or type of outputs based on the selected option (value)
- can be shown or hidden
- has a non-restrictive option
In order for a filter to have effect - be an active filter - it needs to
- be visible
- be set to a non-restrictive option
When multiple filters are applied, their effects are combined with AND logic.
When a filter changes state to shown, or a more restrictive option is selected, an implicit shrinkage of the Timerange setting may occur, possibly resulting in a Nothing found! msg.
In the contrary case, when a filter changes state to not shown, or a less restrictive option is chosen, the Timerange setting is either unaffected, or - if the Checkbox 'Auto Expand...' is checked - can implicitly expand.
Except for the track zone filter (see below), what filters to show is determined by (un)checking four checkboxes in the History Options menu:
- Show Triplet Filters:
- for a group of filters named:
- Mix
- Blend
- Tag
- each with three predefined options
- each has a non-restrictive option All
- for a group of filters named:
- Show GeoRegions Filter
- for a filter with a list of unlimited number of userdefined GeoRegions
- has a non-restrictive option *GeoRegions*
- checkout GeoPlan
- Show Boarders Filter
- for a filter with a list of unlimited number of userdefined Boarders
- has a non-restrictive option *Boarders*
- checkout Crew+Boardings
- Show Attribute Filters
- for a group of filters for each of ten attributes (Sails, ... , Visibility)
- each with predefined options
- each has a non-restrictive option -?-
- only one filter can be shown at a time
Some filters are implemented as pickers, i.e. scrollable lists:
- GeoRegions Filter
- Boarders Filter
- Attribute Filters
To select an item:
- scroll the list (tap, hold, drag and release)
- or tap an item in the list to open a page
Filter specifics:
- the track zone filter
- its setting always appears as part of the top page title
- tap to select a track zone, shown as 'z' + a number (z0, ... , z9), via the Tzones page
- the triplet filters:
- tap to select between:
- Tracks
- Notes
- All
- tap to select between:
- Gps made
- ManTrack made
- All
- tap to select between:
- Without tag
- With tag
- All
- tap to select between:
- the GeoRegion filter:
- tap an item to open the GeoPlan page
- or use the action in the Options menu
- the Boarders filter:
- tap an item to open the Crew+Boardings page
- or use the action in the Options menu
History mainpage: Mix filter
With tracking activity Make a track you create tracks, with Make a note you create notes.
The Mix Filter determines filtering of tracks and / or notes.
Most pages include tracks and / or notes guided by the Mix setting, e.g.:
- Tracklist
- Map
- GPX mapfile
- Photo and Voice
- Mailcomposer
Other pages excludes notes:
- Trackreport
- Barchart
- Piechart
History mainpage: Blend filter
With tracking activities Make a track and Make a note you create so-called Gps made items.
With the ManTrack page, so-called ManTrack made items (tracks or notes) are created.
These two types are considered and processed equal, but in some (e.g. statistical) contexts it may be best to leave out ManTrack made items.
In a find / search for ManTrack items context, it could be best to leave out the (numerous) Gps made items.
History mainpage: Tag filter
Maybe you'd like to group single items (tracks/notes), that temporally or in other ways are separate?
E.g. to compare your last and previous America's Cup performance on Map!
This can be accomplished by tagging these items, with the Toggle Tag action. Which is also used to clear ('un-tag') individual tags.
Use tagging across or in combination with other Filters and the Timerange setting.
In the Tracklist, a tag appears as a capital, yellow T in affected list cell items.
When browsing the Tracklist for the purpose of tagging / untagging, then each time the is done, the item involved will:
- remain in the Tracklist when the filter option All is selected - or when the filter is hidden (i.e. the Show Triplet Filters checkbox is unchecked)
- disappear from the Tracklist when one of the other filter options is selected - and the filter is shown (you will be noticed)
Though tags are saved permanently in the App Database, you'll probably use them in a more transient way.
To isolate all tagged items:
- tap the Remove restrictions button
- select the filter option With tag
- tap the Tracklist button
- and if you want to un-tag them all:
- use repeatedly until the list becomes empty
History mainpage: Attribute Filters
This group of filters covers each of the attributes:
- Sails
- Engine
- Wind dir.
- Wind force
- Curr.dir.
- Curr.force
- Weather
- Waves
- Temp.
- Visibility
Each filter is presented as a dual picker panel, i.e. two identical scroll lists, side by side.
The top of the panel has three buttons:
- browse to previous or last filter
- show info on present filter
- browse to next or first filter
The purpose of having two pickers for the same filter, is to enable definition of ranges, e.g.:
- Wind dir. from Light air to Gentle breeze
- Wind force from nne to ene
If only one value - not a range - is of interest, select that option from either picker, and leave the non-restrictive option -?- in the opposite. Or select the same option in both.
It doesn't matter in which dual picker you select an option.
Also, when defining a range, it's unimportant which picker is used for lower value and which for upper value - i.e. low-high is equal to high-low.
When an Attribute Filter is specified, it serves to extract tracks with event(s) having attribute value(s) meeting the filter.
Furthermore, individual track sections meeting the filter criteria can be identified.
This can be seen in the Map, where relevant sections are colored blue (the Blue sections Picker setting is overridden).
THE TIME SCOPE OF AN EVENT ATTRIBUTE VALUE APPLIES FROM REGISTRATION UNTIL THE VALUE CHANGES - OR TRACKING END.
So, if you register Strong rain and forget to later register Cloudless, sunny hours will be few!
The Attribute Filters are primarily oriented towards tracks and track sections.
They have limited use in relation to Notes, but does apply to the Tracklist.
However, if you specify an Attribute Filter and from the Tracklist open the Map for a Note, a An Attribute Filter is active, but doesn't apply in current context! msg pops up.
Similarly, other pages may give a No track section(s) found! msg if no Track, but only Notes are input, as result of other filter or timerange settings.
History mainpage: Timerange setting
To define a timerange, the page has two always shown datepickers, for Time from and Time till respectively.
A timerange limits the extent of tracks and notes, measured by departure and arrival times - respecting filter settings. It cannot expand beyond oldest and newest item, that satisfy active filter(s). But can be narrowed to one minut when in Date+clock mode.
If all filters are set non-restrictive (or are hidden), it can expand to all history items.
The Remove restrictions button does this, i.e. resets visible filters and then expands.
Showing a filter or changing it to a more restrictive option may consequently shrink a timerange, possibly resulting in a Nothing found! msg.
After using the Tzones page, a timerange may shrink or change completely to accommodate the extent of another Tzone.
Expanding a timerange is manual, unless the Checkbox 'Auto Expand...' is checked.
Conversely, changing the timerange doesn't effect filter settings.
History mainpage: Checkbox 'Auto Expand...'
As described in Timerange setting, timeranges can shrink as a consequence of showing a filter or changing a filter option. This may occur in either or both ends of a timerange.
Subsequent filter changes may leave a given timerange unchanged, thus not covering all items satifying visible filter settings. To access such items, manual expansion of one or both ends of the timerange is needed (the Expand timerange button expands both ends).
By checking the Auto Expand Timerange checkbox, this is done automatically. This means that whenever changing filter visibility or settings, the timerange will be adjusted to cover all items satifying settings of visible filters - if possible.
The Expand timerange button changes title to Auto Exp timerange to reflect the checkbox state. Evidently the timerange may always be changed manually, within boundaries set by current visible filters.
A drawback with respect to 'auto expanding' is, that unintentional tapping output buttons may give large results, requiring long processing time - and patience!.
Conclusion: use it with care!
History mainpage: Save and Restore actions
When exploring the history, you will often change timerange settings back and forth - e.g. when focusing on a single item, and then returning to a previous context.
To support such returnings, then before any focus action updates the current History mainpage timerange [Time from:Time till], it's saved automatically, to later be Restorable.
The action performs this manually, at your wish.
The action restores, if possible:
- timerange must have been saved (automatically or manually)
- timerange pickers must be enabled (i.e. not locked in a Nothing found! or a History is empty! situation)
- the maximum timerange - defined by current filter settings - must be able to contain the saved timerange (filters may not restrict)
Checkout:
History mainpage: On tracks and sections
A track section is a straight line between two adjacent plots in the same track.
A whole track is made up by sections for all its plots. Multiple sections can, depending on the timerange extend:
- be part of a track
- constitute one whole track
- extend over more tracks
Some output functions operate on (require) whole tracks: the Tracklist for example, for anything to be listed.
Other operate on sections (are less demanding): the Map for example, needs at only at least one section living within a given timerange, i.e. at least two plots must have timestamps within it, for something to be drawn.
History mainpage: On Trackreport
The Trackreport summarizes historic tracks, boarders and individual tracks. Aimed at sailing clubs - and number nerds!
It opens from:
| Page: | Action: |
|---|---|
| History mainpage | in Action on Historic tracks? menu |
It starts with a summary of Parameters, Totals and Boarders overview. Info in the Totals section covers:
| Prompt | Comment |
|---|---|
| Whole tracks | 'Yes' or 'No' #) |
| Sails time | of tracks, where event attribute Sails signals sails hoisted *) |
| Engine time | of tracks, where event attribute Engine signals engine running **) |
| Max speed | calculated maximal speed between two plots (not from GPS) |
| Max was at | when max speed occurred |
| in departure | identifies in what track max speed occurred |
#) When timerange specified doesn't cover a number of whole tracks, output is limited.
*) Only calculated when Whole tracks says Yes: Sails time for each track is calculated as the time from events where a Sails attribute signals sails set at any level, until:
- either a following event has a Sails attribute with the value Taking in sails, or:
- the tracking ends (no explicit Taking in sails event needed)
**) Only calculated when Whole tracks says Yes: engine time for each track is calculated as the time from events where a Engine attribute signals engine running at any level, until:
- either a following event has a Engine attribute with the value Stopping, or:
- the tracking ends (no explicit Stopping event needed)
Trackreport is a hidden part of the History mainpage sending output directly to a DocPage, i.e. Trackreport doesn't have a page of its own.
Incidents log Help pages
Are opened from the Incidents log Options Menu - a tap on its action opens:
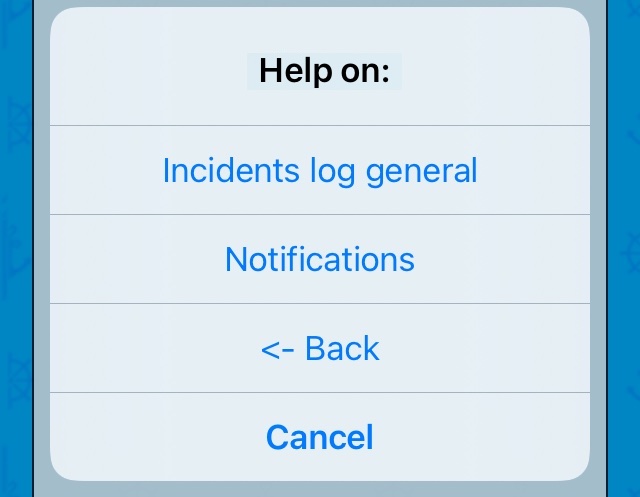
Micro TOC
Incidents log: Incidents log general
Purpose of page: to log warnings triggered by conditions occurring.
It opens from the Track mainpage when tapping its nav.bar button.
An incident is a warning trigged by a condition occurring. Presently the App recognizes incidents with titles:
- WEATHERFETCH PROBLEM
- LOCATION UPDATE PAUSED
- AUTOEND TIMETRIGGER ACTIVE
- ANCHOR ALARM
A new incident is logged to a file. It's also shown on screen, depending on the App state:
- in foreground: as a Toast message
- in background: as a notification
The latter requires you have given allowance to Send You Notifications.
Incidents log: Notifications
After the very first incident occurs, a standard iOS dialog asks for allowance to Send You Notifications.
Allowance gives the App the option to show a standard iOS notification when next incident occurs in the background.
It also enables the App to increase the badge number (the little red circle on the App icon) for each new incident, so you know how many of these you have.
The badge number is reset with the Reset incidents log action.
If you don't give allowance, this can be accomplished later:
- go to Settings -> Sailor Logbook -> Notifications
- switch Allow Notifications ON
- leave everything in default state
Mailcomposer Help pages
Are opened from the Mailcomposer Options Menu - a tap on its action opens:
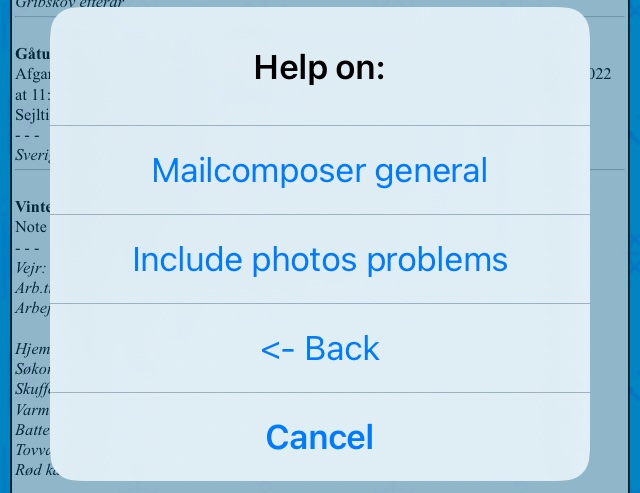
Micro TOC
Mailcomposer: Mailcomposer general
Purpose of page: to prepare and send mail by merging text and photos in historic tracks, based on a template.
It opens from:
| Page: | Action: |
|---|---|
| History mainpage | in Action on Historic tracks? menu |
On open, History content is merged with the current Template and shown in a pinchable (zoomable) web-like page.
The action enables change of layout and content.
Presentation style Full screen is recommended, as it excludes unintentional closing (by dragging down) of the current page when scrolling.
The action - invoking the Date format Picker - and the Include clock in format checkbox sets format of departure and arrival time.
The action - invoking the Photo width Picker - does as it says.
The action sends to the Mail App. It may fail if your device is low on memory, and the Include photos checkbox is set.
Start small to avoid memory or mail server issues - use:
- low downsampling (DS) factor
- few photos
- narrow timerange
Mailcomposer: Include photos problems
When the Include photos checkbox is checked, the resulting composition may not be as expected for some recipients. Garbage codes could occur instead of photos.
Several parameters may influence reception of the mails:
- size and number of photos
- setup and capacity of recipients email account
- setup and type of recipients email client and device
The Apple email client will mostly (but not always) display images correct.
It's recommended to first do a test by selecting yourself as only recipient, and next a few recipients whom can be inquired on the result.
We apologize for the inconvenience - but have not yet found the silver bullet solving the problem. We expect the size of the issue to shrink in step with technical development with html email.
Mailcomposer: Date format Picker
For specifying how to format dates in the Mailcomposer page.
The picker options are:
- Full date
- Long date
- Short date
Examples in English (corresponding to the order above):
- Monday, November 9, 2020
- November 9, 2020
- 11/9/20
The English time designations setting effects layout of departure, arrival and elapsed time.
Mailcomposer: Photo width Picker
For specifying width of photos included in the Mailcomposer page.
The picker options are:
- 300
- 600
- 900
- Dynamic
The photo width (PW) factor determines width in pixels, with which to present photos in the Mailcomposer page.
It also determines width of photos in the Mail App, after being fed by the action.
Actual size of photos is independent of the PW factor - in contrast to the downsampling (DS) factor specifried with the DS factor Picker.
A mail could be composed with a low PW and include photos stored in the App DB with a high DS factor, and though photos would look small, they would expand when extracted (dragged out) from the mail.
The Dynamic option presents the photos in individual sizes, corresponding to the size with which they were stored in the App DB.
ManTimes Help pages
Are opened from the ManTimes Options Menu - a tap on its action opens:
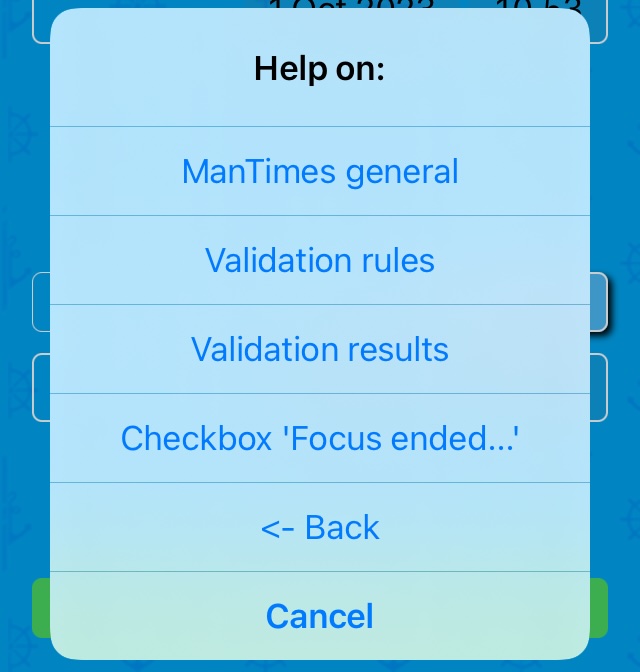
Micro TOC
ManTimes: ManTimes general
Purpose of page: to enable and validate specification of times (date + clock) needed to create a ManTrack Track or a ManTrack Note, as outlined in the ManTrack page (sole opener of ManTimes).
The page has two datepickers, much like the Timerange setting in the History mainpage .
Use them to specify Departure (Dep) and Arrival (Arr) times, constituting a timerange (aka Elt: Elaped time), streching from Time from till Time till).
Time from may expand back to year one, to satisfy historian needs.
Time till can be expanded till now.
ManTimes: Validation rules
In Note context, validation covers:
- Elapsed Time (Elt):
- must be zero (i.e. set the times equal)
- Timerange:
- Departure (registration) time cannot be contained in any existing Track timerange or conflict with any Note Departure (registration) time
In Track context, validation covers:
- Elapsed Time (Elt):
- must be >= 3 minutes
- must be <= 60 days
- Average Speed (AvS):
- must be >= 1.0kn
- must be <= 200.0kn
- Timerange:
- neither Departure nor Arrival time can be contained in any existing Track timerange or conflict with any Note Departure (registration) time
- the Departure -> Arrival timerange cannot contain part of any existing Track timerange or contain any Note Departure (registration) time
ManTimes: Validation results
The page has up to three labels with calculated values. Tap each for info.
If any validation fails, the label corresponding to the first problem, is in red color. Tap it for info / help.
Also, on failure, the button at bottom of the page is disabled.
When validations have success, the labels are all in green color, and the button is enabled.
Tapping it opens a Create a ManTrack? dialog. After confirming, an A Track is created (or an A Note is created) message box pops up.
The message box gives information on how to locate the item that was created, and some next steps guidance.
On longer tracks, it also informs on the tracklength in both ManTrack (Great Circle geometry) and the Tracklist (simple linear geometry, slightly greater).
ManTimes: Checkbox 'Focus ended...'
When is tapped, the item in question is moved to History.
And if Focus ended item in Hist. is checked, the History mainpage is automatically updated:
| Element: | Is: |
|---|---|
| Tzone Filter | set = item Tzone |
| Time from | set = item dep.time |
| Time till | set = item arr.time |
| Date+clock mode | activated |
Before that, the current History mainpage timerange [Time from:Time till] is saved, to later be Restorable.
Also, visible Filters are reset to non-restrictive settings.
This gives direct access to the ended item: only that is visible from History, until timerange or filters are changed.
When un-checked, no change of History mainpage timerange or filters occurs. This means that an ended item usually is invisible from History, until its timerange or filters are changed manually.
ManTrack Help pages
Are opened from the ManTrack Options Menu - a tap on its action opens:
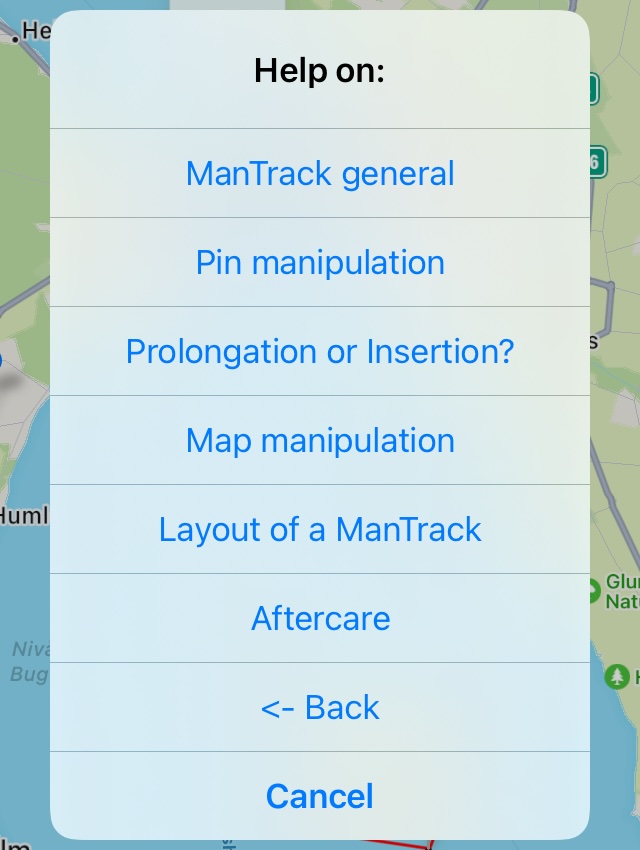
Micro TOC
ManTrack: ManTrack general
Purpose of page: to enable measurement of length of routes and outlining 'manual tracks'.
It opens from Track mainpage and can be used:
- a) as a simple planning tool measuring distances btw two points or length of a route following two or more waypoints
- b) to create substitutes for Tracks (or Notes), which weren't tracked the usual way (forgot device or to start tracking?)
- c) to register Tracks (or Notes) from old material (e.g. paper logbooks)
A single pin is the starting point of a Note.
Two or more pins is the starting point of a Track.
For a) only the first step 1) below applies.
For b) and c) the workflow is:
- 1) drop pin(s) in the ManTrack Map
- 2) tap to open the ManTimes page
- 3) in ManTimes, specify a daterange
- 4) tap button, if the daterange is accepted
The ManTrack button is disabled if:
- no pin(s) are dropped
- a tracking activity is running
- the Device is primary Switch is OFF
When the button is tapped, a Track check examines certain metrics, before ManTimes opens.
ManTrack: Pin manipulation
Drop any number of pin(s) by long-pressing the Map.
The lastly dropped pin is selected, revealing an annotation title in the form Pin X, where 'X' starts from one.
A selected pin may be:
- deleted: tap
- dragged to a new location: tap below the pin head (make it jump) and hold it, then drag and release it (exercise makes master!)
Tap a blank area to de-select.
Tap any pin to select it manually.
First pin is light green if alone (~ Note), and else green (~ Start of Track).
If two or more pins are dropped, the last pin is red (~ End of Track).
Pins in-between are orange (~ User Events).
ManTrack: Prolongation or Insertion?
Whenever a long-press occurs, a new pin is dropped at the touch location - and automatically selected.
If two of more pins already existed, it is decisive whether the last (red) pin before the long-press:
- a) was selected (automatically / manually), or:
- b) was not selected, because:
- nothing was selected, or:
- another pin was selected (unimportant which, provided it's not the last)
a) Prolongation applies: no matter touch location, a new track section is drawn from the previously last pin to the touch location.
b) Insertion applies: the pin closest to the touch location is identified, and a new pin is inserted between that pin and its neighbor pin, creating a bend of the track section in between.
If, by accident, the opposite of the wanted action happens, just tap to undo it.
Deleting the last pin auto-selects the new last pin. Deleting other pins auto-selects nothing.
ManTrack: Map manipulation
First time ManTrack opens, or after a action, the ManTrack Map is empty and centered on a blue pin showing your location - provided you allowed the App to use your location.
Whenever a new pin is dropped after a long-press, the map centers on it.
To focus a whole track, tap the (Adjust) button - which also reveals current tracklength and number of pins.
Move, zoom and rotate the Map using standard gestures: drag, doubletap, pinch ...
If it's hard to select a certain pin, zooming in helps by distancing the pins.
ManTrack: Layout of a ManTrack
When preparing a Note, simply drop a single pin (long-press Map) as the first and only pin, representing a location relating to the Note.
When preparing a Track, drop two or more pins for start and end of it. Add any # of in-btw pins, as appropriate. The more pins you drop, the more exact a Track is described and drawn.
All pins are turned into Events after track creation, and can then be edited.
If you want to specify attributes (wind, weather etc) for a known location, drop a pin there to create basis for an editable User Event.
To create a track (or note), first tap in the ManTrack page, and then in the ManTimes page.
The ManTrack page doesn't include specification of varying speeds. By virtue of track layout and ManTimes specs, only AvS can be deduced and simply applies to whole tracks.
If any of the three speed related options in the Blue sections Picker is applied, all sections of ManTrack tracks are therefore red.
ManTrack: Aftercare
After tapping the button in the ManTimes page, the item created can be located in the Tracklist page.
The ManTimes: Checkbox 'Focus ended...' helps doing that - as well as the information in the ManTimes: Validation results message box.
As a minimum, the title should be changed. Use the Track / Note editor. Also enter any text in the empty Comments field.
The Action on Historic track(s)? menu items apply as usual (as for Gps made items)
Also User Events (created from pins dropped in the Map) are editable. Use the Event editor, accessible from the Eventlist and from Event pins in the usual Map page.
Besides the Event editor, any Action on Event? menu item apply as usual.
ManTrack: Linewidth Picker
For specifying width of lines drawn on maps.
The picker options are:
- Thin
- Medium
- Thick
The best choice is a matter of taste, device and Map composition.
The selected option is shared with:
Map Help pages
Are opened from the Map Options Menu - a tap on its action opens:
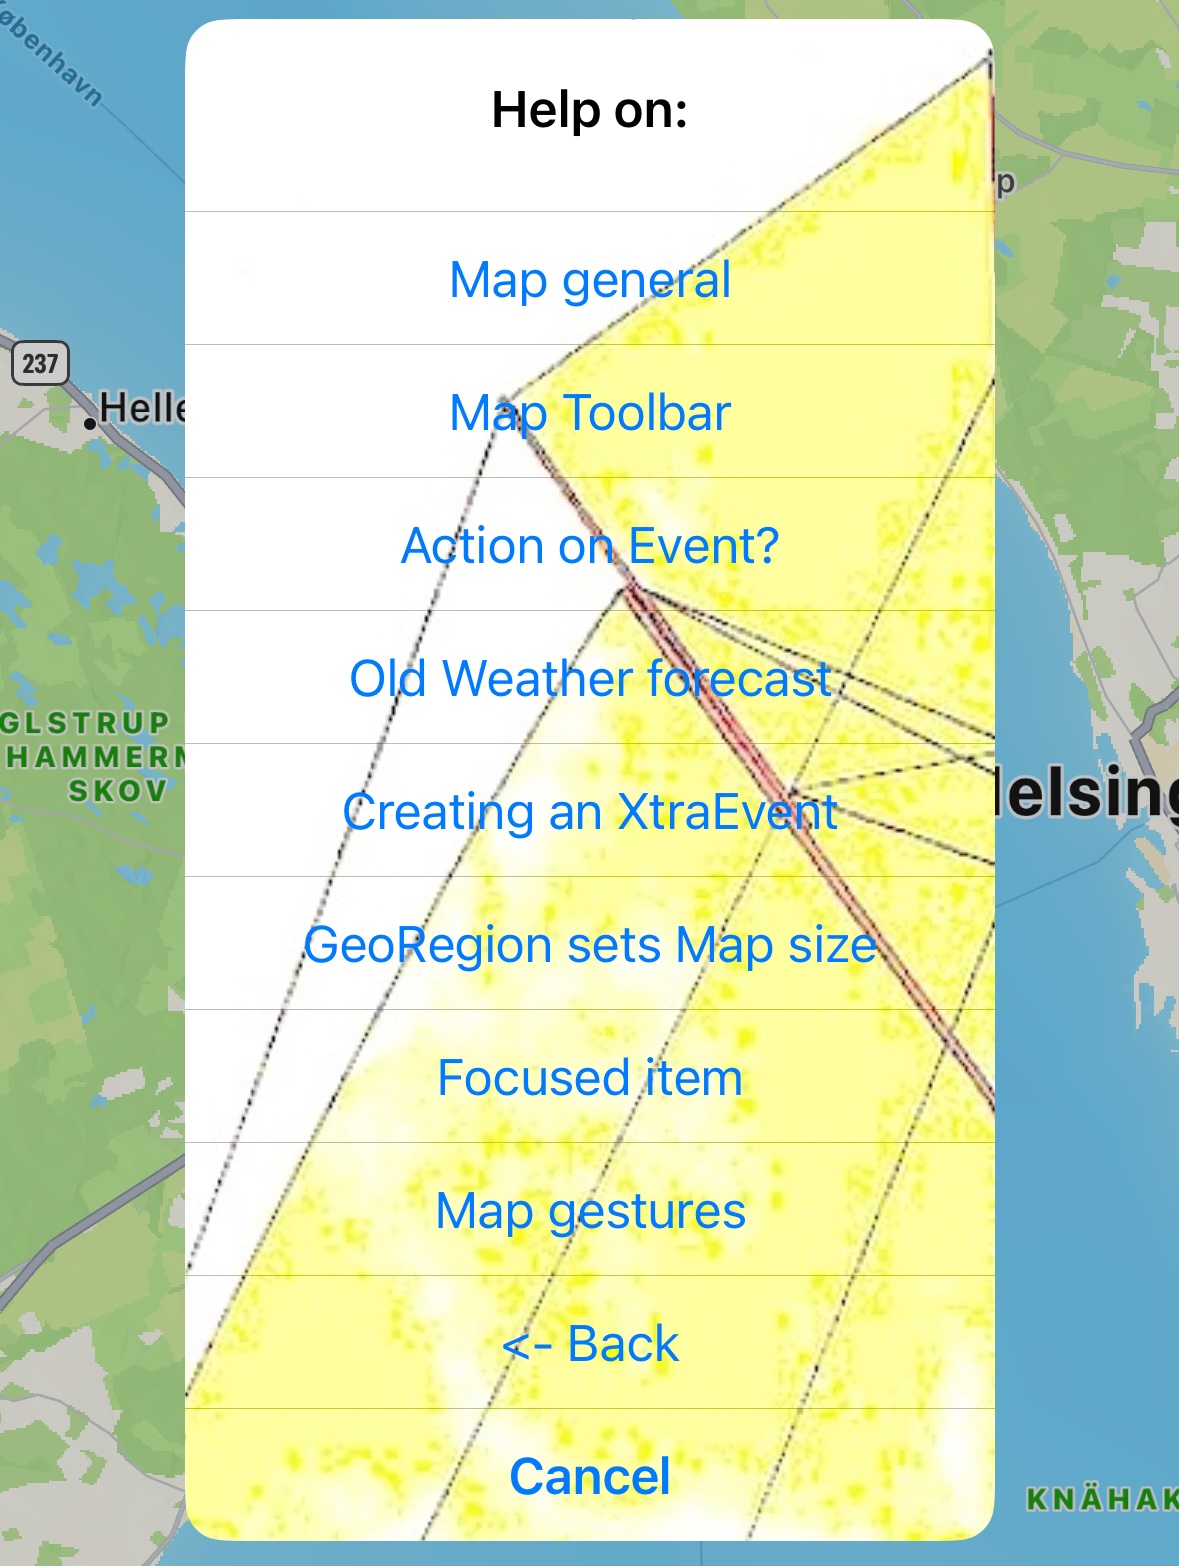
Micro TOC
Map: Map general
Purpose of page: to show tracks or notes (current and historic) on a Map, give access to editing and deletion of events.
It opens from:
| Ref: | Page: | Action: |
|---|---|---|
| 1) | Track mainpage | CurrMap button |
| 2) | History mainpage | HistMap button |
| 3) | Tracklist via 2) |
in Action on Historic track? menu |
| 4) | Barchart via 1) or 2) |
in Barchart Options menu |
| 5) | Eventlist via 1) or 3) |
in Action on Event? menu |
Its content is based on settings of:
- Settings mainpage Pickers
- History mainpage Filters
- History mainpage Timerange setting
- MapSet Pickers and Switches
Tracks display as straight line sections.
Notes display as Note plots, i.e. light green eventpins, which are shown regardless of setting of MapSet: Show eventpins Picker.
A GeoRegion - if applicable and selected in the GeoRegions Filter - displays as a black rectangle.
Map: Map Toolbar
Whenever one of the Attribute Filters is applicable, a Toolbar appears at the bottom of the Map page.
Each of the filters allows for spefication of a single value (e.g. Sails, 2. reef) as well as a range of values (e.g. Sails, 2. reef ... Full sails).
When a range of values is specified, and more than one of these are found, the Toolbar < and > buttons can be used for browsing each.
For a selected value, one or more track segments of the blue colored track sections are marked with >2< arrows each, and their total length shown.
Map: Action on Event?
This menu opens via eventpins. To make these appear, use the Show eventpins Picker.
Tapping an eventpin opens a Callout popup, a small view with some information and a Disclosure button ('i' in a circle). Tap it to open the a menu with actions covering:
- opening the Event editor
- showing a linked photo in Blowup
- playing a linked Voice
- defining a Focused item
- deletion
Map: Old Weather forecast
This action in the Map Options menu opens an Old Weather forecast dialog.
The action is disabled until a first forecast has been fetched - or if an old forecast has somehow been invalidated (e.g. by communication errors).
To fetch a new / first forecast, checkout Long-press mode Picker.
A forecast has 40 entries (5 day / 3 hour partitioning), each with a date + clock heading and 5 items:
| Name | Value examples | Note |
|---|---|---|
| Wind direction | nil, N, ... NW, nnw | - |
| Wind force | Calm (nil), Light air, ... Violent storm, Hurricane | A,B |
| Weather | Cloudless, Some clouds, ... Snow, Thunder | - |
| Temperature | Very hot, Hot, ... Cold, Frost | B |
| Visibility | Good, Mod., ... Lgt fog, Hvy fog | - |
A) Both wind speed and gust are requested from the data source; if gust is specified, it has preference over speed.
B) A more specific value is specified by the data source and shown as an addition in italics and parentheses.
These are the same 5 pieces of data returned by the Weatherfetch feature - and presented in same format - i.e. mapped from the data source the same way - as in e.g. the Event editor.
Map: Creating an XtraEvent
An XtraEvent is a user event, placeable anywhere on an ended track, as attachment to an existing (previously hidden) plot.
It can be used for additional info that wasn't:
- registered during tracking
- included in ManTrack when doing track layout
- or in situations where truncation of a track is wanted
- provided approximate location is known.
A Track has a number of subordinate Events, each attached via a Plot (aka location):
   Track ->
      Plot -> First plot Event
      Plot
      Plot -> User Event
      Plot
      Plot -> Last plot Event
Open the MapSet: Long-press mode Picker and select XtraEvent (X).
Back in the Map, simply long-press close to a point on a track to place it:
- the track plot nearest the long-press point is changed from being a hidden plot to be anchor for a user event, then shows its orange user event pin and opens its Callout popup
- tap the popup's Disclosure button ('i' in a circle) to open its Action on Event? menu
- tap the Event editor action for additional info
If a Disclosure button seems dead, tap it again!.
Zooming in mey be needed for precise placement.
If a Too far from track(s) msg pops up, no hidden plot closer than 500m from the long-press point was found.
Events attach to existing plots - these are at most 200 meter apart (except maybe in resumed tracks). Since a new XtraEvent attaches to the plot nearest the long-press point, precision is <= 100m
If you only need to know the timestamp of a hidden plot, open the MapSet: Long-press mode Picker and select the Nearest (N) option.
Adding XtraEvent's applies only to maps opened by History mainpage and by Tracklist
Map: GeoRegion sets Map size
This checkbox is found at top of the Map Options Menu. For it to be applicable, opener must be:
| Ref: | Page: | Action: |
|---|---|---|
| 1) | Track mainpage | CurrMap button (monitor your current location compared to a previously created GeoRegion) |
| 2) | History mainpage | HistMap button |
| 3) | Tracklist via 2) |
in Action on Historic track? menu |
Furthermore a GeoRegion must have been picked - i.e. a rectangle must appear on Map.
The checkbox state determines what size the Map should fit:
- when checked: fit size of GeoRegion picked
- when un-checked: fit size of tracks (as usual)
Changing its state causes zooming in / out.
As an alternative and a supplement, use the action, which doesn't cause zooming.
Map: Focused item
A Focus this item action is found in the Action on Event? menu.
It's only applicable when the Map is opened directly from the History mainpage.
Depending on the situation, it may be labelled otherwise, e.g. 'Focus this item (already focused)'.
When the action is tapped, the History mainpage is automatically updated:
| Element: | Is: |
|---|---|
| Time from | set = item dep.time |
| Time till | set = item arr.time |
| Date+clock mode | activated |
Before that, the current History mainpage timerange [Time from:Time till] is saved, to later be Restorable.
The Filters are un-affected.
- and the Page closes to make the History mainpage re-appear.
Here any action (e.g. Trackreport and Mailcomposer) will operate on the item that was selected.
The Page Options menu has a Return focused item checkbox. When checked, the it re-opens after visiting the History mainpage.
Replace the word Page with Tracklist or Map.
Map: Map gestures
Use these gestures and shortcut taps on a Map or a Map pin:
| To: | Do this: |
|---|---|
| move the Map | tap, hold and drag |
| zoom the Map in | double tap |
| zoom the Map in/out | two-finger pinch out/in |
| rotate the Map | two-finger turn |
| see a Distance to point msg | set Long-press mode, long-press anywhere |
| see a Nearest point to msg | set Long-press mode, long-press anywhere |
| fetch a Weather forecast | set Long-press mode, long-press anywhere |
| create an XtraEvent | set Long-press mode, long-press close to a track |
| open a Callout popup | tap a Map pin |
| open the Action menu in a Callout menu | tap the Disclosure button ('i' in a circle) in the popup |
| open Event editor | tap action |
| delete an event | tap action |
If a Disclosure button seems dead, tap it again!.
MapSet Help pages
Are opened from the MapSet page - from where the opening screen is repeated here:
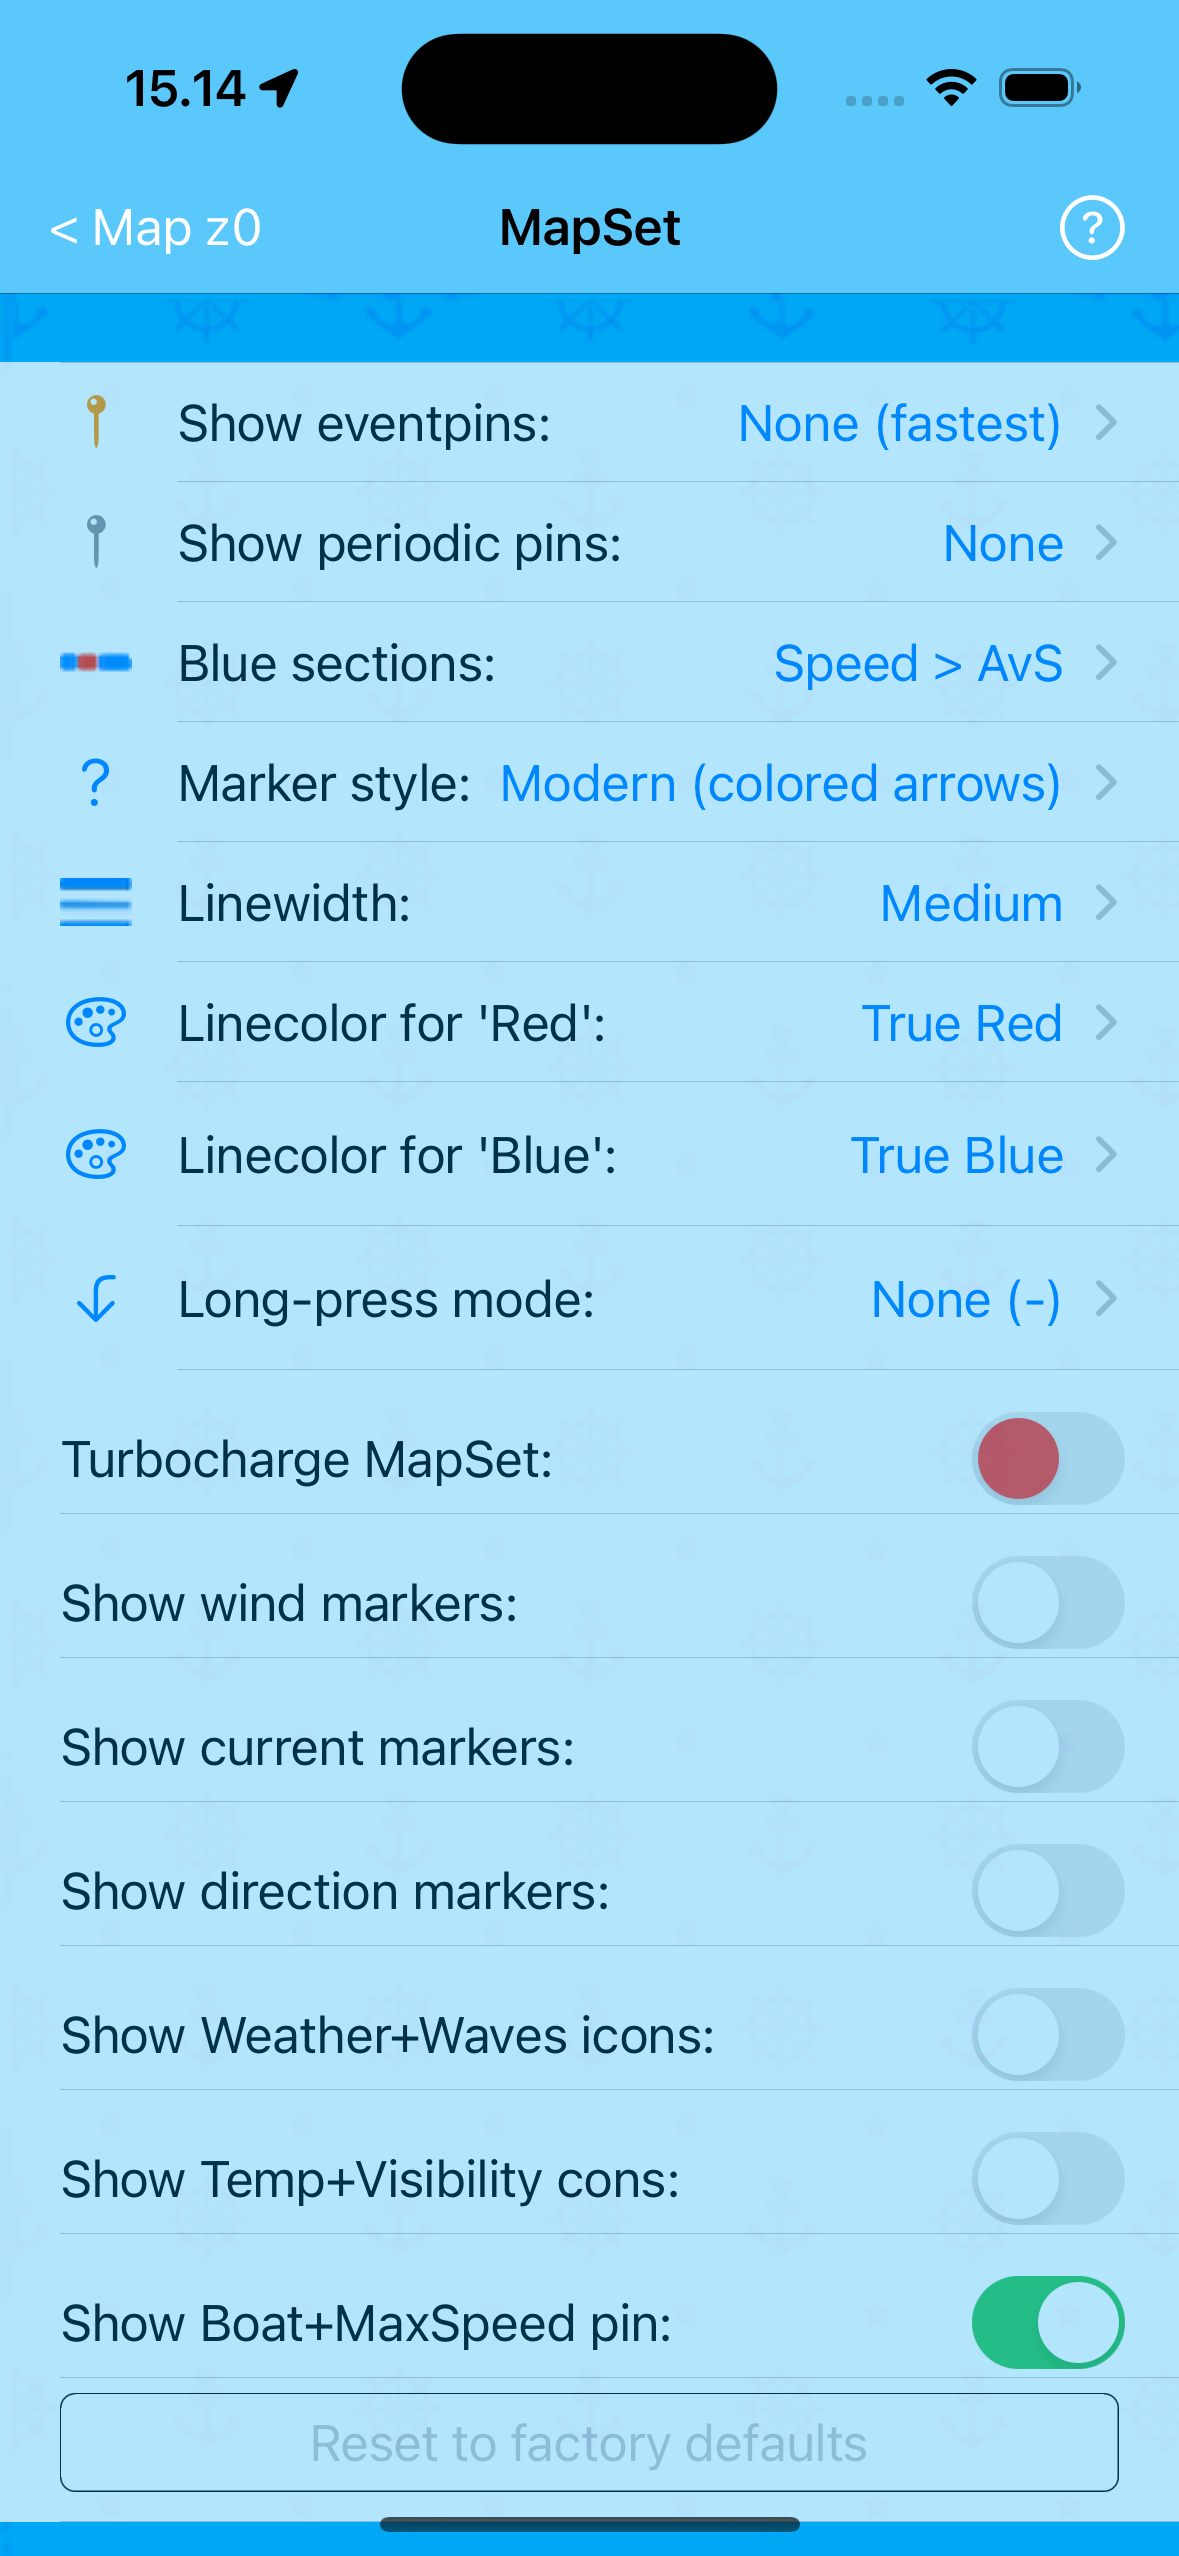
Micro TOC
MapSet: MapSet general
Purpose of page: to handle option settings that control behaviour and display of the Map page.
First comes a number of pickers, each with a (sub)page for choosing one of more options. Tap the label of a picker to open it.
Each picker page has specific help: tap the nav.bar in its nav.bar.
Then comes some switches, each for choosing one of two options (ON or OFF). Tap the the icon of a switch on the right side to toggle it.
Each switch has specific help: tap the label of a switch to the left of its icon.
At the bottom, find some action buttons .
MapSet: Show eventpins Picker
For specifying Eventpins to show.
The picker options are:
- None (fastest)
- First plot
- Last plot
- First and last
- All (slowest)
- Wind
- Current
- Weather & waves
- Temp & visibility
- W/ photo or voice
- W/ photo only
- W/ voice only
- W/ photo & voice
- W/ ph.lnk to voice
Eventpins give access to Hrs-Dist-Avs calculations on maps, plus options to show, edit + delete events from maps.
These pins are drawn in colors:
- green: first plot event
- orange: user event plots
- yellow: plots with photo or voice
- red: last plot event
- black: MaxSpeed pin
- light green: notes (pins never suppressed)
The 'W/ ...' options display yellow eventpins for event with photos/voices (using and / or / only combinations).
If a photo or voice is linked to first or last plot, the usual color for these (green and red) has priority.
MapSet: Show Per. pins Picker
For specifying time interval - frequency - with which to show Periodic pins. Time is measured from the start of each track.
The picker options are:
- None
- Each 5 min
- Each 15 min
- Each 30 min
- Each 60 min
- Each 2 hrs
- Each 4 hrs
Periodic pins are drawn in grey color.
They give access to Hrs-Dist-Avs calculations on maps, as well as an overall impression of travel progress.
Yacht racers will probably prefer a high frequency - and long distance sailors a lower one.
MapSet: Blue sections Picker
For specifying which parts of track(s) shown in the Map, that shoukld be shown in blue color.
The picker options are:
- None (all are red)
- Speed > AvS
- Speed > AvS + 10%
- Speed > AvS + 20%
Speed registration is automatic.
The picker is disabled when one of the Attribute Filters is applied, because determining which sections to color blue is then done by that filter.
MapSet: Marker style Picker
For specifying with which style wind- and current markers are drawn.
The picker options are:
- Modern (colored arrows)
- Classic (std.met.symb.)
Wind- and current conditions can be registered manually with the Event editor.
In addition, wind conditions are registered automatically when the Weatherfetch feature is active.
To display markers on the Map, corresponding Show ... switches must be set ON.
MapSet: Linewidth Picker
For specifying width of lines drawn on maps.
The picker options are:
- Thin
- Medium
- Thick
The best choice is a matter of taste, device and Map composition.
The selected option is shared with:
MapSet: Linecolor for 'Red' Picker
For choosing a shade for Red track segments drawn on the Map.
The picker options are:
- True Red
- Indian Red
- Imperial Red
- Salmon
- Yellow
Construct a Map with a combination of both Red and Blue track segments, by for example choosing a Speed option in the Blue sections Picker.
Then try out the shade options for best contrast. Maybe you'll have different preferences in light and dark mode?
Evaluation of best choice should be done in parallel with testing the Linecolor for 'Blue' Picker options.
MapSet: Linecolor for 'Blue' Picker
For choosing a shade for Blue track segments drawn on the Map.
The picker options are:
- True Blue
- Capri Blue
- Berry Blue
- Argentina Blue
- Arctic Blue
Checkout the Linecolor for 'Red' Picker comments.
MapSet: Long-press mode Picker
For specifying a long-press action in the Map.
To use long-press, tap and hold down on the Map for one second.
The picker options are:
- None (-)
- Distance (D)
- Nearest (N)
- Weather forecast (W)
- XtraEvent (X)
Access the picker directly by tapping the Map nav.bar button with a one-letter abbreviated title (-,D,N,W,X) next to the Map page title.
The action of a long-press depends on the selected option:
- None (-)
- no (unwanted) action
- Distance (D)
- inform on distance from your current location to the long-press point, which is marked with a circle
- Nearest (N)
- the track plot nearest the long-press point is marked with a circle and its timestamp is shown
- applies to any plot to show when you were where - also to hidden plots (i.e. plots without event)
- Weather forecast (W)
- the long-press point is moved to top center and marked with a circle, and a New Weather forecast dialog pops up
- the Map can be moved anywhere in advance
- to re-evoke a previously fetched forecast - and read comments on its content - checkout Map: Old Weather forecast
- XtraEvent (X)
- adds a user event, placeable anywhere on an ended track, by attaching to an existing (previously hidden) plot
- checkout Create an XtraEvent
No long-press action applies to Notes. The Weather forecast (W) option doesn't relate to any plot, and the other options applies to Track plots only.
MapSet: Turbocharge MapSet Switch
When ON: any change in any of the pickers and switches - except the current - in the MapSet page dismisses the MapSet page, upon which the Map page reappears immediately.
I.e. there is then no need to exit the MapSet page manually. It behaves more responsive.
Also, after change in a picker and exit to the Map, on re-entering MapSet the picker that did the change, is reopened.
For any picker, tapping any of its options - except an already selected - is considered a change. Tapping its button is not a change.
For any switch - except the current - tapping it is likewise considered a change.
Exceptions:
- changing option in the Long-press mode Picker may give a msg on new setting of the Show eventpins Picker, which prevents exit
If you want to make several changes in a row:
- set the current switch OFF
- do the changes
- tap the button
MapSet: Show wind markers Switch
When ON: wind markers are shown for events where wind direction and -force is registered.
Wind registration may be manual (using Event editor) and automatic (using Weatherfetch feature).
MapSet: Show current markers Switch
When ON: seq current markers are shown for events where current direction and -force is registered.
Current registration can only be done manually (using Event editor).
MapSet: Show direction markers Switch
When ON: equally spaced markers (5 arrows) are drawn for each whole track on Map.
Partial tracks may have fewer markers, spaced as if shown wholely.
The markers makes it easier to interpret Map screenshots.
MapSet: Show Weather+Waves icons Switch
When ON: icons are shown for events where weather and / or waves conditions are registered.
Weather registration may be manual (using Event editor) and automatic (using Weatherfetch feature).
Waves registration can only be done manually.
MapSet: Show Temp+Visibility icons Switch
When ON: icons are shown for events where temperature and / or visibility conditions are registered.
Both temperature and visibility registration may be manual (using Event editor) and automatic (using Weatherfetch feature).
MapSet: Show Boat+MaxSpeed pin Switch
When ON: a sailboat sprite moves around chronologically, from first to last plot - AND a black pin indicates location of maximum speed for the track(s) shown.
Remarks:
- the sailboat sprite is only shown in historic maps
- MaxSpeed relates to all shown track sections, be it a fraction of one track, one whole track or many tracks
- tapping the MaxSpeed pin shows timestamp, maximum speed value and the usual Hrs-Dist-Avs calculations
- if there is Convergence of an Event pin and the MaxSpeed pin, the MaxSpeed pin hides the event pin (until the switch is set OFF)
MetaMap Help pages
Are opened from the MetaMap Options Menu - a tap on its action opens:
Micro TOC
MetaMap: MetaMap general
Purpose of page: to show a position in the Map, based on Metadata of a photo.
It opens from:
| Page: | Action: |
|---|---|
| Photo | tap MM mark next to photo-title - or: in Action on Photo? menu |
| Blowup | tap MM mark next to photo-title |
Presence / absence of a MM mark next to the title of a photo indicates if photo Metadata (creation date + coordinates) exists.
Photos taken with the Shoot button will usually have Metadata.
The MetaMap is independent of the (usual) Map page, and only shows the position a photo was taken.
This is useful for locating photos that are not connected to any event in a track, and are therefore not localizable for display in Map page context.
Photos taken with the Shoot button will always be connected.
Presence / absence of an #E: mark next to title of a photo indicates if it's connected to event(s).
A photo - with Metadata - could be not connected either because Add Strategy was used, or referencing link to Photo was cut in the Event editor.
Photo Help pages
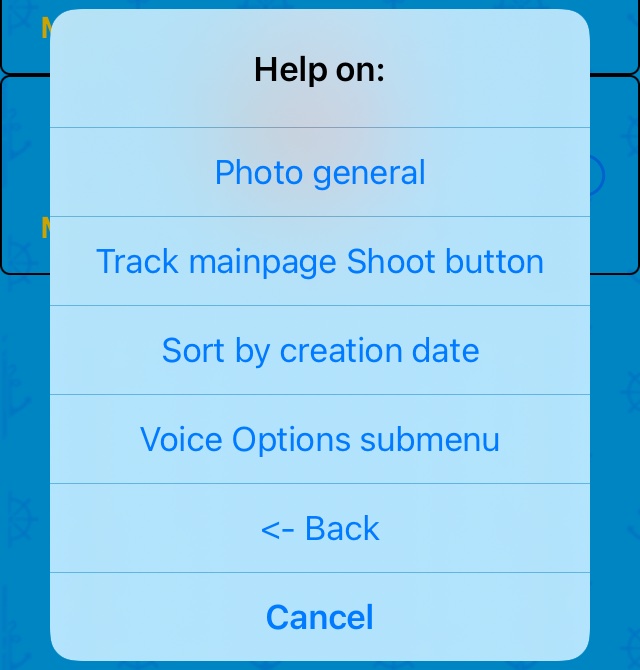
Are opened from the Photo Options Menu - a tap on its action opens:
Micro TOC
Photo: Photo general
Purpose of page: to enable creation and management of photos picked from the Cameraroll, as well as managing photos taken with the Shoot button.
Handling voices and photos is very similar.
It opens from:
| Ref: | Page: | Action: |
|---|---|---|
| a) | Track mainpage | in Action on Current track? menu |
| b) | Tracklist | in Action on Historic track? menu |
| c) | History mainpage | in Action on Historic tracks? menu |
| d) | Event editor | in Photo Options submenu |
c) operates at group (multiple) tracks level (note the 's' in 'trackS'), the others at single track level.
In context of this App, a photo is a copy of an image produced by Downsampling an item:
- picked from the Cameraroll with the action, available from the Photo page when in Single track mode (see below)
- taken with the built-in Camera, activated by the Track mainpage Shoot button
Photos attach to a given track (or note) - just like events - and live in the App database (not linked to Cameraroll).
In Group mode, is disabled. Items can be copied / moved to other tracks using Clipboard actions.
Items can be:
- assigned titles
- moved up / down (within same track)
- deleted (swipe to delete)
Voice(s) may be linked to photo(s) with the action. In the Voice page, the number of photos linking to a given voice, is shown next to its title.
Links between tracks, photos and voices can be shown as (arrows go from superior -> inferior):
            +-------------+
            !    Track    !
            +-------------+
              !         !
              v         v
   +------------+     +------------+
   !   Photo    ! <-- !   Voice    !
   +------------+     +------------+
Read the diagram like:
- a track has zero or more voices added
- a track has zero or more photos added
- a voice can be linked to zero or more photos
- a photo has zero or one link to a voice
The optional link to voice in a photo may reference any voice - whether attached to the same or another track as the photo.
Throughout the manual, unless otherwise stated, the term track also covers note.
Photo: Track mainpage Shoot button
The Shoot button is a companion to for adding photos via the Shoot page. The button is only accessible when tracking or making notes.
The Shoot page has / is a built-in Camera - use its limited functionality for a simple way to capture and (when not making notes) localize photos.
Use the in the Photo Options menu of the Photo page, if the standard Camera app suits you better, and you accept a more complex way of adding photos to tracks and notes.
Photo: Sort by creation date
Using the action to pick one photo at a time results in a well defined order of photos for each track, which is probably as you want it.
If so, don't use the action. Instead, use the and actions to fine tune ordering.
On the other hand, if you pick several photos at a time, the ordering easily becomes random.
If so, the action comes in handy. It sorts:
- photos without Metadata first, in same mutual order
- photos with Metadata next, ordered by creation date
Photo: Voice Options submenu
Use the action in this submenu to browse voices, and next the action for a specific voice item in the Voice page.
Then return to the Photo page to manipulate a copied item with action(s) in the Voice actions submenu for a specific photo item.
When in Single track mode, the voice collection to browse is limited by what's recorded for a given Track / Note.
When in Group track mode, the collection is limited by timerange and filter settings in the History mainpage, and may span multiple tracks/notes.
In the latter case, a voice added (with or Dictate ) to one Track / Note, can be copied and then manipulated (with ) on a photo added to the same or another Track / Note.
Photo: Add Strategy Picker
For specifying how to connect a photo to a selected track.
The picker options are:
- Don't connect
- Try connect
- Must connect
Add Strategy Don't connect:
- doesn't require any user allowances
- doesn't need access to Metadata
- doesn't try to connect
- applies to Notes, no matter Strategy choice
Add Strategy Try connect:
- requires user allowances
- Metadata must exist + be accessible
- sets a tappable MM next to title
- connection doesn't have to succeed
- but sets a tappable #E: next to title if it does
Add Strategy Must connect:
- like Try connect
- but connection must succeed
A connections is done via an existing or an Autogen.event, based on nearest plot calculations, prioritizing plots with events over those without.
Events, to which photos connect, are yellow in the Eventlist and Map. In the Map, they are highlighted with the MapSet: Show eventpins Picker option W/ photo or voice.
Connections are links that can be managed in the Event editor via its Photo Options submenu.
Photo: DS factor Picker
For specifying with what factor a photo picked from the Cameraroll (after tapping the Photo page action) should by downsampled, before saving it to the App database (DB).
The picker options are:
- 300
- 600
- 900
The factor selected also applies when downsampling photos taken by tapping the Track mainpage Shoot button (see Shoot: DS factor Picker).
A typical 6 MB Cameraroll item consumes this approx. amount of space in the App DB (and a little more in Backup files):
- lowest value: 280 KB
- middle value: 1.1 MB (~ 280 KB * 4)
- highest value: 2.5 MB (~ 280 KB * 9)
The value equals sidelength (in pixels) of the bounding square, into which to downsample. Selecting a value is a choice btw quality and consumption.
The aim of Downsampling is to avoid bloating of the App database (DB) and Backup files.
If your device is low on memory, use a small value and / or limit the amount of photos per track (or note).
Photos saved in the App DB with one factor, can be downsampled further using another factor with a lower value.
Photo Item Help pages
Addresses specific items in a Photo page list - tapping a Disclosure button for one of these opens the Action on Photo Menu (Specific).
Further tapping and actions in this menu opens other action menus, where tapping shows the help pages below.
Micro TOC
Photo Item: Photo Clb actions
Actions in this submenu enables copy / paste of individual photos btw tracks, and also paste in the Event editor.
An action in the Photo Clipboard (short: Clb) submenu may have a textual extension, and in some cases also be disabled, e.g.:
Paste from Photo Clb (empty)
| Extension: | Means: |
|---|---|
| (no link) | event has no linked photo |
| (empty) | Photo Clb is empty |
| (equal) | Photo Clb = linked voice |
| (replace) | update existing link to photo |
| (new) | insert new link in event |
Examine content of Photo Clb with the action.
Photo Item: Voice actions
Use actions in this submenu to manually manage links from photos to voices, via the Voice Clipboard (short: Clb).
An action in the Voice actions submenu may have a textual extension, and in some cases also be disabled, e.g.:
Paste from Voice Clb (empty)
| Extension: | Means: |
|---|---|
| (no link) | photo has no linked voice |
| (empty) | Voice Clb is empty |
| (equal) | Voice Clb = linked voice |
| (replace) | update existing link to voice |
| (new) | insert new link in photo |
| (duplic) | voice already linked to track |
Examine content of Voice Clb with the action.
Piechart Help pages
Are opened from the Piechart Options Menu - a tap on its action opens:
Micro TOC
Piechart: Piechart general
Purpose of page: analysis of sailing, weather and sea conditions regarding current and historic tracks, based on temporal distribution.
It opens from:
| Ref: | Page: | Action: |
|---|---|---|
| a) | Track mainpage | in Action on Current track? menu |
| b) | Tracklist | in Action on Historic track? menu |
| c) | History mainpage | in Action on Historic tracks? menu |
c) operates at group (multiple) tracks level (note the 's' in 'trackS'), the others at single track level.
A precondition for the analysis is, that you register these conditions when cruising.
An Attribute picker controls What to show:
- Sails
- Engine
- Wind dir.
- Wind force
- Curr.dir.
- Curr.force
- Weather
- Waves
- Temp.
- Visibility
A Timeunit picker controls How to show:
- Percent
- Days
- Hours
- Minutes
Values for Minutes are shown without decimals - the other units have one decimal.
Calculation rules:
When opened from a) and b), the timerange is implicitly Elapsed time of the given track.
When opened from c), the timerange is specified with two datepickers and used to fetch plots (aka locations) within it.
In c), Date+clock mode can be set for precise specification - calculations and display of time are based on seconds.
As Notes have no temporal extent, they are excluded.
Each type of attribute can have several discrete values. Calculations follow these rules:
- each track within given timerange is treated individually (time between tracks doesn't count)
- time from departure till a first specified attribute is found, counts as unset / no registration (labelled -?-), except:
- for the Sails / Engine attribute: if unspecified at departure, it counts as No sails respectively No engine - see:
Piechart: Coloring and Rotating
Pie slice colors are random and change each time the chart is displayed. If a chart is hard to read, tap the icon - or the equivalent action - to generate another set.
Selecting a slice by tapping it, highlights it and informs on the number of registrations from which it's build.
A chart can be rotated by tapping, holding and dragging a slice. This can improve readability of text on a slice if eclipsed by text of another slice.
When not in Full screen presentation style, rotation is best done by dragging horizontally.
Settings mainpage Help pages
Are opened from the Settings mainpage - from where the opening screen is repeated here:
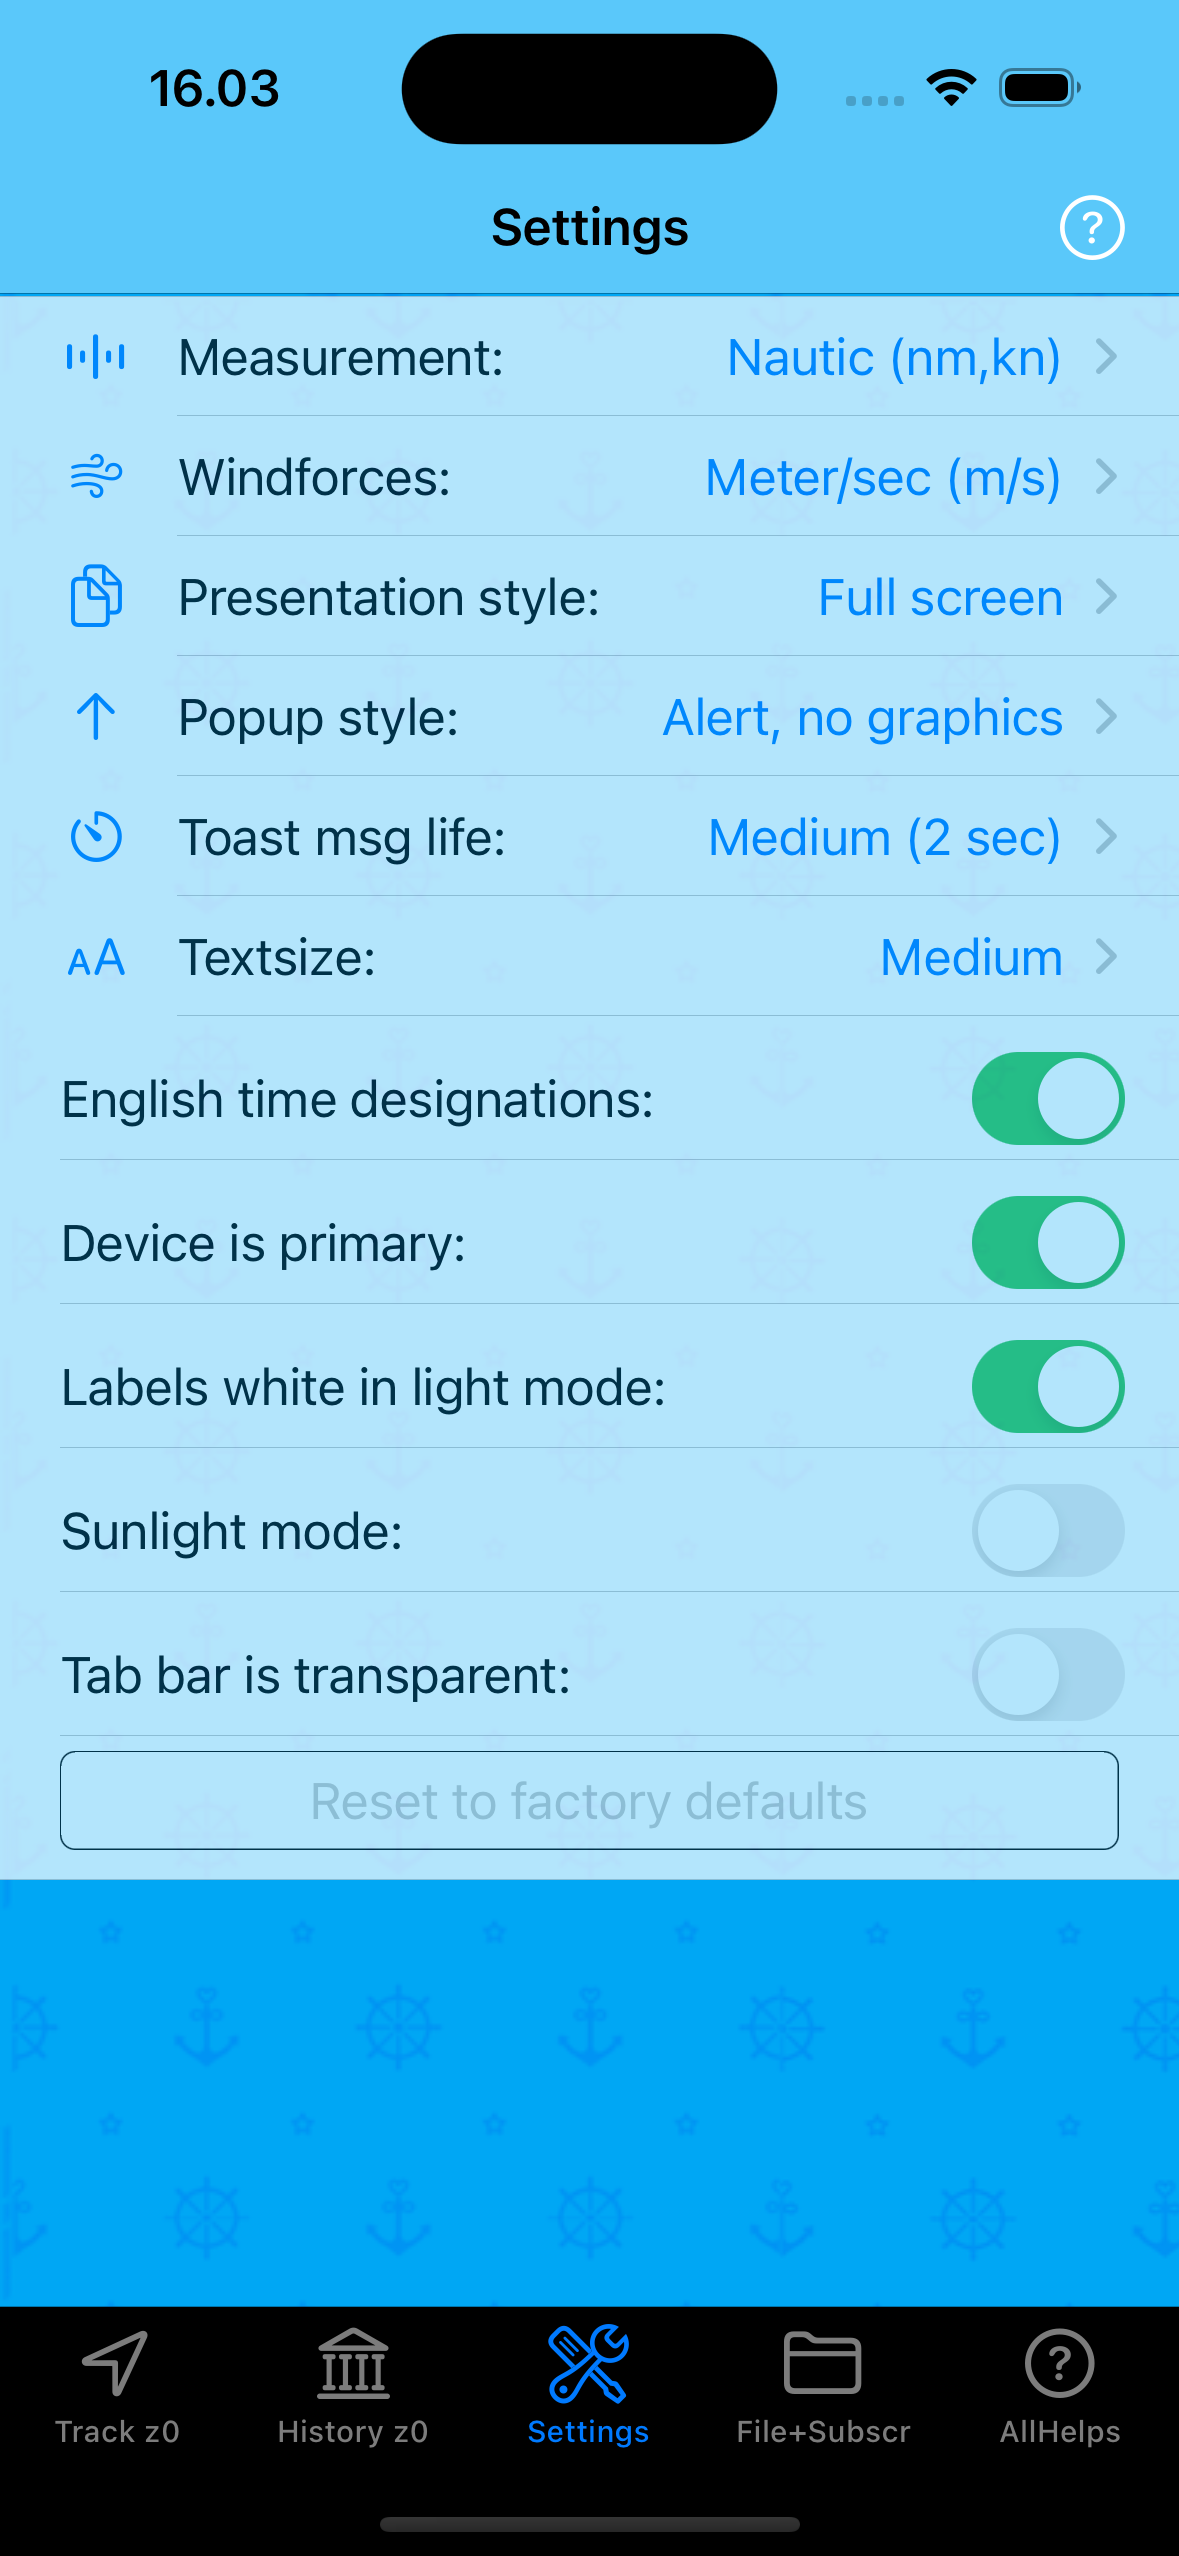
Micro TOC
Settings mainpage: Settings general
Purpose of page: to handle option settings that control overall App behaviour and display.
Settings is third of five mainpages, selectable from the bottom tab bar icon .
First comes a number of pickers, each with a (sub)page for choosing one of more options. Tap the label of a picker to open it.
Each picker page has specific help: tap the nav.bar in its nav.bar.
Then comes some switches, each for choosing one of two options (ON or OFF). Tap the the icon of a switch on the right side to toggle it.
Each switch has specific help: tap the label of a switch to the left of its icon.
At the bottom, find some action buttons .
Settings mainpage: Measurement Picker
For specifying unit for measuring distances and speed.
The picker options are:
- Nautic (nm,kn)
- Metric (km,km/h)
- Imperial(mi,mi/h)
Most sailors will probably prefer the default (Nautic), but for terrestrial use one of the other units may fit better.
Settings mainpage: Windforces Picker
For specifying unit for measuring windforce.
The picker options are:
- Meter/sec (m/s)
- Knots (kn)
- Beaufort (B)
The following table gives the relation between the measuring units:
| Description | Meter/sec | Knots | Beaufort |
|---|---|---|---|
| Calm (nil) | < 0.5 m/s | < 1 kn | 0 B |
| Light air | 0.5-1.5 | 1-3 kn | 1 B |
| Light breeze | 1.6-3.3 | 4-6 kn | 2 B |
| Gentle breeze | 3.4-5.5 | 7-10 kn | 3 B |
| Moderate breeze | 5.6-7.9 | 11-16 kn | 4 B |
| Fresh breeze | 8.0-10.7 | 17-21 kn | 5 B |
| Strong breeze | 10.8-13.8 | 22-27 kn | 6 B |
| Near gale | 13.9-17.1 | 28-33 kn | 7 B |
| Gale | 17.2-20.7 | 34-40 kn | 8 B |
| Strong gale | 20.8-24.4 | 41-47 kn | 9 B |
| Storm | 24.5-28.4 | 48-55 kn | 10 B |
| Violent storm | 28.5-32.6 | 56-63 kn | 11 B |
| Hurricane | >=32.7 m/s | >=64 kn | 12 B |
The designations follow the Beaufort scale convention.
Settings mainpage: Pres. style Picker
For specifying how subpages (i.e. pages opened from one of the mainpages) are shown.
Usually subpages are simply designated pages.
The picker options are:
- Full screen
- Page sheet
- Form sheet
Presentation style Full screen is the default. Here, dismissal of a subpage is done by tapping its button in the left side of the nav.bar.
This must often be repeated to reach the corresponding mainpage (at bottom of the view stack).
In addtion there are two sheet styles:
- Page sheet
- Form sheet
On the iPhone, these are equal and appear as a sheet (aka a card) partly covering the page or sheet from which it was opened. On the iPad they are different.
A sheet can be dismissed either by tapping its button (as above), OR by pulling it down.
Like above, in some situations repeat this.
Settings mainpage: Popup style Picker
For specifying how popups (i.e. messages, dialogs and a few help pages) are shown.
Almost all help pages are shown in The DocPage instead.
- Alert, no graphics
- Alert, with graphics
- Sheet, no graphics
- Sheet, with graphics
The styles fall in two groups:
- the Alert group:
- less space consumption
- shown at screen middle
- the Sheet group:
- wider and more 'modern'
- not recommended for small screens
- iPhone: shown near screen bottom
- iPad: shown at screen middle
The with graphics items display a yellowish graphic overlay, substituting the yellow colour scheme applied by the Sunlight mode Switch, when that switch is ON.
The 'Welcome to Sailor Logbook' popup uses a 'with graphics' item, regardless of your selection.
On exit from the Popup style Picker, a Popup style Demo demonstrates looks of the selected option.
Most popups have a or an button. On the iPad, these may be absent: instead tap anywhere outside the popups.
Settings mainpage: Toast msg life Picker
For specifying how long time a Toast message (a short message flashing info on an action or condition) should live.
The picker options are:
- Glimpse (0.1 sec)
- Short (1 sec)
- Medium (2 sec)
- Long (4 sec)
- XLong (7 sec)
- XXLong (10 sec)
Toast messages require no user interaction.
They may be warnings: such can't be suppressed, even by the Glimpse (0.1 sec) option.
In a few situations, the lifetime is doubled to increase readability.
Settings mainpage: Textsize Picker
For specifying a suitable textsize for certain text fields and areas - e.g. the text here.
The picker options are:
- Tiny
- Small
- Medium
- Large
- Huge
The larger the textsize, the larger the chance title texts are clipped.
The selected textsize applies to content on screen only. Content in The DocPage is always presented in a standard textsize, when output to printer or mail.
Settings mainpage: English time designations Switch
For specifying display of weekdays and time.
When ON: English designations apply.
If OFF: your first preferred language (an iOS setting) designations apply.
If English, the switch can NOT be turned OFF.
Your first preferred language is: English.
At App start the switch was ON; with this setting:
- today is: Thursday
- and time for example: 10.242 hours, 44 minutes
Settings mainpage: Device is primary Switch
For specifying if this device is for read and write use OR for read use only.
This switch has significance if you're using the App on more than one device, and you want to keep them syncronized. If you use the App on one device only, keep the switch in ON state and forget about it.
A device with the switch set ON is open for any kind of modification of the App database (tracking etc.), and is considered a primary device.
A device with the switch set OFF protects its database against updates, and is a secondary device.
A secondary device is syncronized by exporting from the primary device and (via iCloud Drive) importing into it.
A device must stay primary, as long as the App database has changes that haven't been exported - i.e. the switch can NOT be turned OFF until then.
Setting of this switch is unaffected by the Save and Reset buttons at the bottom of the Settings mainpage.
Replication work flow.
Having done some tracking and related registrations and updates on the primary_device, a need to replicate this to a secondary device may arise.
To do so, establish a connection between the devices and via a Backup file:
- On the primary device:
- use the Export page to create a Backup file of your App database
- in the standard iOS Files App, manually copy the Backup file from the Sailor Logbook folder to iCloud Drive
- Wait for iCloud to do its work
- On a secondary device:
- in the Files App, manually copy the Backup file from iCloud Drive to the Sailor Logbook folder
- use the Import page to update your App database
              +---------------+
              !  Backup file  !
              +---------------+
                ^ A        !
                !          !
                v B        v C
  +---------------+      +---------------+
  !  Primary dev. !      ! Secondary dev.!
  +---------------+      +---------------+
Legend:
- A): export regularly
- B): import only if needed
- C): import after each A)
Settings mainpage: Labels white in light mode Switch
When ON, texts for labels are white in both light and dark mode.
If OFF, they are black in light mode and white in dark mode.
This also applies to descriptions at bottoms of Barchart and Piechart.
An exception is Event editor labels: these are always white.
Settings mainpage: Sunlight mode Switch
When ON, a colour scheme with high visual contrast for better use in direct sunlight is applied: the background color of buttons, navigation bar, tab bar, menus, dialog boxes and message boxes is changed to yellow.
It cannot be set ON while in Dark appearance (aka dark mode).
A glitch: if the switch is set:
- ON: the tab bar gets incorrect color
- OFF: the navigation bar gets incorrect color
In both cases, correct color is achieved by tapping another (main)page.
Settings mainpage: Tab bar is transparent Switch
When ON, the usual black background of the tab bar is suspended, making it light bluish. Some may say it makes the tab bar visibility more prominent.
Superceeded by the Sunlight mode Switch if that is also set ON.
Shoot Help pages
Are opened from the Shoot Options Menu - a tap on its action opens:
Micro TOC
Shoot: Shoot general
Purpose of page: to present a built-in custom Camera to take photos when tracking, localizing them in the Map via yellow eventpins.
It opens from the Track mainpage when tapping its Shoot button, which is enabled when tracking and making notes.
It has / is a built-in Camera with limited functionality, and always works in Full screen presentation style.
A further tap on its big round trigger button opens The Shot preview page
When tracking, Shot adds a photo to the track and further:
- makes a plot (aka Location)
- attaches an Autogen.event to it
- links this event to the photo
- giving a yellow Map photo eventpin.
When making notes, Shot simply adds a photo to the note.
Photos in the Sailor Logbook App database are compressed by Downsampling, using the DS factor selected.
And they include Metadata (creation date + coordinates) if created by:
- the Shoot / Shot page - or from the companion:
- the Photo page action - unless Add Strategy Don't connect is selected.
Shoot: The Shot preview page
This page previews the last photo taken in the Shoot page.
If its Let Shot page autosave? checkbox is ON, the Shot page autosaves and closes automatically after a short glimpse.
Otherwise, it stays open to let you decide if you are satisfied with the preview.
If so, tap to accept and save, else tap to cancel.
On cancel, the usual Unsaved changes warning is bypassed here.
When tracking, you must move after autosaves or taps, in order for a plot to be made.
Shoot: Checkboxes
The Stay open on Shot Done? checkbox state controls if this Shoot page stays open after tapping in the Shot page - or after Shot autosaves. Set it:
- ON, if you often make multiple shots in a row. Close to Shoot page manually (with the button)
- OFF, if you usually make single shots only. Re-open the Shoot page by tapping the Track mainpage Shoot button, after every - or after Shot autosaves
The Let Shot page autosave? checkbox state controls if in the Shot page is automatic. Set it:
- ON, if you don't want to check a preview before a photo is saved. The Shot page closes automatically after a short glimpse
- OFF, if you want the Shot preview page to stay open. Then eiher tap to accept and save, or tap to cancel
The Save to Cameraroll also? checkbox state controls if photos should be saved there also. Set it:
- ON: if you want to have an un-downsampled (high quality) copy outside the App *)
- OFF: you'll only need a downsampled photo stored in the App database
*) Your authorization is needed on the first save ("Sailor Logbook" Would Like to Access Your Photos) - unless already granted when using the Photo page action.
Photos saved to the Cameraroll from this App are synchronizable to other Apple devices the usual way, and importable by DropBox and probably other storage providers as well.
The Show downsamples? checkbox state controls if the Shot page shows photos downsampled (i.e. as saved in the App database) or - when OFF - as in the Shoot page, and as saved in the Cameraroll.
Photos in the App database are always downsampled, but never in the Cameraroll.
Shoot: The 'Add from Cameraroll' alternative
The Photo page action is a companion to the Shoot / Shot page.
Use it if the standard Camera app suits you better, and you accept a more complex way of adding photos to tracks and notes.
Shoot: DS factor Picker
For specifying with what factor a photo taken (after tapping the Track mainpage Shoot button) should by downsampled, before saving it to the App database (DB).
The picker options are:
- 300
- 600
- 900
The factor selected also applies when downsampling photos after tapping the Photo page action (see Photo: DS factor Picker).
Set the Show downsamples? checkbox ON for visual check of the effect of different picker options.
Speeds Help pages
Are opened from the Speeds Options Menu - a tap on its action opens:
Micro TOC
Speeds: Speeds general
Purpose of page: to inform on course & speed over ground (COG & SOG) and - if wind is known - velocity made good (VMG).
It opens from the Track mainpage when tapping its nav.bar button.
Data from the GPS are collected from the device and cached whenever you move while tracking, whether the Speeds page is open or not.
If wind is known, also a computed velocity made good (VMG) is cached.
Wind registration may be manual (using Event editor) and automatic (using Weatherfetch feature).
The cache contains up to 100 entries. It's cleared manually, or (when wind is known) you change course > 60° - i.e. when you are tacking.
The page top: informs on cache filling and has a Max. # samples to calc. Avg.: button opening the Max. # samples Picker.
The page middle: has a switchable Compass Subview and Graph Subview.
The Page bottom: shows current and average values of SOG and (when wind is known) VMG.
Speeds: Page bottom
Shows current + average (Avg) values of SOG in a first line, and - when wind is known - VMG in a second line.
Avg values are average of the newest samples, the # specified by the picker opened from the page top button. This # is a max, as fewer may be in the cache,
When the Focus: VMG checkbox is OFF, current value of SOG is green if it's > Avg, otherwise it's red.
Green is 'good', red is 'bad'.
When the checkbox is ON, current VMG value is green if it's > Avg, else it's red. When wind is unknown, no such coloring occurs.
For VMG, 'good' is a positive value (i.e. when beating against the wind) that increases OR a negative value (i.e. running with the wind) decreasing.
Speeds: Compass Subview
Displays a circle with 16 markers (N, nne, ... , nnw). N is up, unless the North is up checkbox is OFF - in which case current COG is up.
COG is shown as a blue triangle inside the circle, pointing outwards.
If wind is known, it's direction display as an orange triangle outside the circle, pointing inwards.
Weatherfetch'ed wind directions are true, not apparent.
Tap one subview to toggle to the other.
Speeds: Graph Subview
A blue line-graph shows development of SOG, based on cached samples.
Its Avg value is shown as a white dotted average line. the length of which equals the # samples for calculation of average values.
Below the Avg graph, a thin white dotted zeroline is drawn.
If wind is known, an orange line-graph displays the VMG development, including another white dotted average line.
In contrast to the SOG graph, the VMG graph can occur below the zeroline.
Tacking or manually clearing the cache restarts the graph drawing.
Tap one subview to toggle to the other.
Speeds: Max. # samples Picker
Determines the # (number of) newest samples in the Speeds buffer to be used when calculating average value of SOG - and VMG (provided wind is known).
The picker options are:
- 2
- 10
- 50
- 100
The lowest value (2) covers current / newest entry plus its prior entry.
The highest value (100) corresponds to a full cache.
Choose a low value for intense speed optimization (racing).
A high value gives an idea of overall performance (distance sailing).
Template Help pages
Are opened from the Template Options Menu - a tap on its action opens:
Micro TOC
Template: Template general
Purpose of page: to enable a user defined layout of the (superior) Mailcomposer page.
It opens from Mailcomposer when tapping its Pencil nav.bar button, and the current template is shown.
The standard template is a factory default, the current template is a copy, maybe adapted by you.
The action is disabled, if the current and the standard templates are equal.
Feel free to edit the template. Tap to see any effects in Mailcomposer. Tap the button to cancel edits.
Mailcomposer replace placeholders by actual values; placeholders start with a '$' followed by 3 lowercase letters:
| Abbreviation: | Means: |
|---|---|
| $tit | Title |
| $dep | Departure |
| $arr | Arrival |
| $elt | Elapsed time |
| $len | Track length |
| $avs | Average speed |
| $max | Maximal speed |
| $com | Comments |
Mailcomposer ignores comments which are:
- lines starting with '//'
- anything after '//' in lines
HTML elements are possible - e.g. to make Title appear in bold, write '<b>$tit</b>' in your template.
Hints on some HTML elements are found in the standard template.
The line:
## KEEP THIS DIVIDER LINE AS IS ##
splits a template into a track and a note parts, and must be kept unchanged in current template(s).
This way Mailcomposer may process input from History with a Mix of both Tracks and Notes.
Track editor Help pages
Are opened from the Edit track Options Menu - a tap on its action opens:
Micro TOC
Track editor: Track / Note editor general
Purpose of page: to display and enable change of core data of tracks and notes.
It opens from:
| Page: | Action: |
|---|---|
| Track mainpage | in Action on Current track? menu |
| Tracklist | in Action on Historic track? menu |
| Photo | in Info on Photo menu |
| Voice | in Info on Voice menu |
When opening for a note, substitute Track editor with Note editor.
Use this editor to display and change:
- Title
- Tzone (tap Z to open the Tzones page)
- Comments
Tap to save changes and exit.
Tap the button (upper left corner) to exit or cancel changes.
Track editor: Tzone numbering
For any track, its Tzone number can be changed to any other number (tap the Z button to open Tzones page).
The term track covers note.
This can be done during or after tracking.
You can move a track to any other Tzone, even to an empty one.
The Tzones page informs on usage of all Tzones.
When browsing the Tracklist for the purpose of changing Tzones, then each time the is tapped, the item involved will:
- remain in the Tracklist when the virtual Tzone (z9) is applied
- disappear from the Tracklist when any other Tzone is applied (you will be noticed)
Track editor: Feeding ManTrack
The track or note shown in the editor is input as a feed to the ManTrack page.
The editor must be opened from the Tracklist for the action to be enabled.
For a track, its two (first plot- and last plot-) or more (user-) events constitute pins. Departure and arrival times constitute ManTimes.
For a note, only one pin is generated.
The real track or note - as shown in the Track editor and in the Tracklist - is unaffected.
Consider the feed a template for creating similar items. Or for just planning / experimenting.
Do NOT consider it a substitute for real items, especially if Aftercare has been done on these, as this isn't contained in feeds to ManTrack.
Track mainpage Help pages
Are opened from the Track Options Menu - a tap on its action opens:
Micro TOC
Track mainpage: Track general
Purpose of page: Starting , managing and ending tracking activities.
Track is first of five mainpages, selectable from the bottom tab bar icon . It's opened on App start, i.e. it's the first page you'll see.
Tracking activities are:
All pages (screens) have a navigation bar at top with page title, and some buttons.
A (sub)page opened from a mainpage has a button in left side of its navigation bar, to return to its opener - possibly cancelling changes.
Actions are represented by:
- navigation bar
- page body buttons
- menu
An action may be disabled (incative) in a given context - if so, it's dimmed.
Track mainpage: On starting
First check that Privacy -> Location Services in the iOS Settings App are enabled.
Then tap START a tracking activity .
On the very first start, an Authorization Status not determined dialog opens. You should continue and then tap in a Allow "Sailor Logbook" to use your location? dialog.
Finally tap START ... again and then select a tracking activity action.
The START ... button turns into a slowly blinking END ... button, and when the GPS is warmed up, the activity starts.
Factory default settings will probably be satisfactory for your first activity.
Later check the TrackSet page for current settings. Trim these before or after an activity has been started.
If you use the track zone feature, you may want to check the Tzones page before or after START. Just tap the page title () ('X' is a number).
Once the GPS is ready, tracking goes into a running state.
Track mainpage: 'Make a track' running
Whenever a movement of between 10 and 200 meter occurs, the App makes and saves a plot with location + time.
The nav.bar at top of the page has a number of buttons opening various pages:
| Action: | Opens: |
|---|---|
| Incidents log | |
| Speeds | |
| Tzones | |
| TrackSet |
The middle part of the page has textfields for Title and Comments, both are for unlimited length free text, editable before and during tracking.
Below the Comments field some so far statistics are displayed:
| Promt | Meaning / remark |
|---|---|
| Dep | Departure time, i.e. the time you started tracking |
| Arr | Arrival time, i.e. the time the last plot was done |
| St | State of the track (here: 'Trkg', i.e. Tracking / being tracked) |
| Plots | Number of plots |
| Len | Tracklength |
| Elt | Elapsed Time, i.e. time from departure to current time / arrival |
| AvS | Average speed between first and last plot |
| Max | Maximal speed from GPS since start |
Tracklength is shown in meter during the first 1000 meter - thereafter it's shown in Nautical Miles (nm) by default.
Outputs for the current track or note are made with buttons at the lower part of the page:
| Action: | Opens: |
|---|---|
| New event | Event editor |
| CurrMap | Map for current track |
| CurrMore | Action on Current track? menu |
| Shoot | Shoot |
| Dictate | Dictaphone |
| ManTrack | ManTrack |
Associate the prefix 'Curr' with 'Current'.
Screen space is too limited for all actions to appear simultaneously. Thus some exist in a menu opened by the CurrtMore button ('Current item, more actions'):
| (Sub)page |
|---|
| Track / Note editor |
| Eventlist |
| Barchart |
| Piechart |
| Crew+Boardings |
| Photo |
| Voice |
If a Camera shot is done, the Dictate button shows a countdown timer: if it's tapped when the timer runs, then the Dictaphone is in autolinking mode.
The Camera shot (photo) is then automatically linked to the dictated voice. (If more recordings are done in a Stay open Dictaphone, only #1 is linked to).
When autolinking isn't enabled (i.e. no timer), voice recordings are saved as unreferenced events (to which photos may be linked manually).
Tap END a tracking activity to bring tracking into ending state.
Track mainpage: 'Make a track' ending
Tap END activity on arrival.
If more than 3 minutes did pass since last location was saved, that location serves as last plot, and tracking ends immediately. In worst case, the last up to 200 meter will be missing.
Otherwise the GPS fetches a final position - this may take some seconds.
So if you don't tap END shortly after arrival, there's no prolonged Elapsed Time penalty when you finally tap it - provided you don't move around!
When a track is ended, it's moved to History, most actions are disabled and the Track mainpage goes to sleep.
If an extended period of time has elapsed since last location update (i.e. movement), ending of tracking may occur automatic, leaving a LOCATION UPDATE PAUSED msg in the Incidents log.
Unfortunately pause detection (an iOS feature) isn't reliably - checkout TrackSet: AutoEnd timetrigger Picker for a compensation.
If for some reason tracking proceeded longer than intended, the Event editor: Truncate Track action may come in handy.
Track mainpage: 'Resume last track'
When a track has been ended - or was interrupted - you have the option to resume it.
Resuming only applies to the newest track, and only if it has state Recorded - i.e. it hasn't been exported.
Otherwise the Resume last track activity is disabled and marked '(n/a)'.
After the activity is started, it's quite similar to the Make a track activity.
Ending a track to later resume it, saves battery on long, straight-line cruises.
But distance and speed calculations will be wrong - unless following a straight line while not tracking.
Resuming is recommended primarily in emergency situations (device lost battery power etc), as the intended use of the App is recording uninterrupted cruises from harbor to harbor.
Track mainpage: 'Anchor'
This activity monitors that your boat (i.e. device) stays within an alarmzone with a given radius, to detect drifting.
Set or change the radius before or while anchoring, with the Anch. alarmzone rad. Picker.
When starting the activity, the GPS fetches a location plot constituting the assumed anchor location.
Whenever slight movements occur, plots are made, and it's checked if the device is still within the alarmzone.
If not, an incident is trigged, giving an alarm sound that repeats until the activity is ended, and leaving a ANCHOR ALARM msg in the Incidents log.
Anchoring is technically a track that can be inspected with the CurrMap button which (besides ManTrack ) is the only button that's enabled in the bottom part of the Track mainpage.
Ending the activity deletes the track - anchorings are never kept.
Track mainpage: 'Make a note'
Tracking is centric on movement - sailing or otherwise. But in between you may want to annotate e.g. harbor life. Notes are for that.
A note could also summarize a days work with spring preparations on the boat. Or use the App as a diary?
When starting the activity, the GPS fetches a location plot with a timestamp constituting departure time. A note is much like a track, but it:
- cannot be resumed
- has only one plot and one event, with Text-note Note plot (= first event)
- has no temporal extent, i.e. neither distance nor speed value
- has a special light green pin color in the Map, where it always appears, even if the Show eventpins Picker has a None (fastest) value
- is marked with a big red N next to its title, in both the Track mainpage and the Tracklist
Track mainpage: Checkbox 'Focus ended...'
When a tracking activity is ended, the item in question is moved to History.
And if Focus ended item in Hist. is checked, the History mainpage is automatically updated:
| Element: | Is: |
|---|---|
| Tzone Filter | set = item Tzone |
| Time from | set = item dep.time |
| Time till | set = item arr.time |
| Date+clock mode | activated |
Before that, the current History mainpage timerange [Time from:Time till] is saved, to later be Restorable.
Also, visible Filters are reset to non-restrictive settings.
This gives direct access to the ended item: only that is visible from History, until timerange or filters are changed.
When un-checked, no change of History mainpage timerange or filters occurs. This means that an ended item usually is invisible from History, until its timerange or filters are changed manually.
Tracklist Help pages
Are opened from the Tracklist Options Menu - a tap on its action opens:
Micro TOC
Tracklist: Tracklist general
Purpose of page: to list tracks in history, give access to editing and deletion of these, give access to misc. other actions.
It opens from History mainpage (only) by tapping the Tracklist button. Its content is based on setting of:
- Filters
- Timerange
- Settings mainpage selections:
To scroll to top (if not already there): tap the in the nav.bar of the Tracklist.
Tracklist: Action on Historic track?
This menu opens by tapping the Disclosure button ('i' in a circle) in the right side of each list cell. The button opens a menu with actions to open:
Tracklist: List order
The Tracklist Options menu has two radiobuttons:
- Order ascending: old first
- Order desc.: new first
To change the list order, simply tap the un-checked one.
Tracklist: Search
To do a search:
- tap the Search textfield
- enter a search argument
- optional: tap Both or Title or Comments in the Scopebar
- tap Search or Enter on the keyboard
Or, to exit: tap Cancel once or twice.
The Tracklist Options menu has two checkboxes:
- Case sensitive search
- Whole words search
- to activate / deactivate one or both options.
Their state is NOT saved when the Tracklist closes, i.e. they are OFF each time the Tracklist opens.
The Scopebar is dark blue when one is / both are activated.
The description in the AllHelps mainpage: Search help page is very similar to the current description.
Tracklist: Focused item
The Action on Historic track? menu contains the action Focus this item.
Depending on the situation, the action may be labelled otherwise, e.g. Focus this item (already focused).
When the action is tapped, the History mainpage is automatically updated:
| Element: | Is: |
|---|---|
| Time from | set = item dep.time |
| Time till | set = item arr.time |
| Date+clock mode | activated |
Before that, the current History mainpage timerange [Time from:Time till] is saved, to later be Restorable.
The Filters are un-affected.
- and the Page closes to make the History mainpage re-appear.
Here any action (e.g. Trackreport and Mailcomposer) will operate on the item that was selected.
The Page Options menu has a Return focused item checkbox. When checked, the it re-opens after visiting the History mainpage.
Replace the word Page with Tracklist or Map.
Tracklist: Toggle Tag
See History mainpage: Tag filter for a description of tagging items and using the filter.
Tracklist: Tracklist gestures
Each list cell represents a whole track (or note). Use these gestures and shortcut taps for a specific item:
| To: | Do this: |
|---|---|
| open Action menu | tap the Disclosure button ('i' in a circle) to the right |
| open Map | tap Title field |
| open Track editor | tap Comments field |
| scroll a page | tap, hold and drag left or right margin |
| scroll a long comment | drag inside the field |
| delete a track | swipe left |
If a Disclosure button seems dead, tap it again!.
If a , a or a action was done in the menus:
- Action on Current track / ... note
- Action on Historic track / ... note
- or a Shoot or Dictate button in the Track mainpage was used, this shows as tiny coloured areas (e.g. #B:3 / #P:2 / #V:2), serving as shortcuts.
Use them as alternatives to the Action on Historic track / ... note menu actions. Fallback to the menu, if shortcuts are hard to hit.
TrackSet Help pages
Are opened from the TrackSet page - from where the opening screen is repeated here:

Micro TOC
TrackSet: TrackSet general
Purpose of page: to handle option settings that control behaviour and display of the Track mainpage subpages.
First comes a number of pickers, each with a (sub)page for choosing one of more options. Tap the label of a picker to open it.
Each picker page has specific help: tap the nav.bar in its nav.bar.
Then comes some switches, each for choosing one of two options (ON or OFF). Tap the the icon of a switch on the right side to toggle it.
Each switch has specific help: tap the label of a switch to the left of its icon.
At the bottom, find some action buttons .
TrackSet: Sails at start Picker
For specifying your sail setting at start.
The picker options are:
- -?-
- No sails
- Sails, 2.reef
- Sails, 1.reef
- Full sails
- Gennaker
On starting a Make a track activity, a first plot event is made when the GPS is warmed up and you start moving.
The Sails at start option you selected, is then copied to the sails attribute of this first plot event (the -?- option means undefined).
Event attributes can be inspected and changed with the Event editor.
If you usually depart from harbor by engine, use the No sails option.
And whenever you change sails or engine conditions during cruising, make an appropriate event.
Coordinate with the Engine at start Picker. Together these two constitute a set of assumption pickers.
You will probably want to have one and only one of these two set to an active option. Together with recorded values of the Sails and Engine attributes, these picker settings affect the Sails time and Engine time calculations.
You don't need an explicit 'taking sails down' event at arrival, since ending a track implicitly signals that.
Similar rule applies to starting and stopping the engine.
This first plot event attribute setting also applies when making tracks with ManTrack.
TrackSet: Engine at start Picker
For specifying your throttle setting at start.
The picker options are:
- -?-
- No engine
- Slow ahead
- Half ahead
- Full ahead
The description in the Sails at start Picker also applies here, when you substitute sails with engine.
If you usually depart from harbor by sails, use the No engine option.
TrackSet: Tracking beep Picker
For specifying kind of beep sound for each GPS plot during tracking.
The picker options are:
- None
- SMS Tweet sent
- SMS Received
- SMS Calypso
- SIM CallDropped
- SIM GeneralBeep
- SIM PositiveACK
When tracking, a beep is heard when a plot is made, i.e.:
- at start and end of tracking
- when move between 10 and 200 meter
- an event is made (manually or automatic)
Every time you move 10 meter, the distance from the current location to a line through the two last saved plots is evaluated, to determine whether it should be saved as a plot as well (the very first two locations are always saved). If you thereafter follow a straight line, a plot is saved each 200 meter, unless your track bends before that - causing more frequent saves.
A beep sound way gives a way to check that the GPS works ok. If you don't need or want any noise from the App while tracking, select the None option. Otherwise select a sound that doesn't conflict with other sounds, to avoid confusion.
TrackSet: Weatherfetch freq. Picker
For specifying how often the Weatherfetch (Wf) feature should try to fetch data at OpenWeather while tracking.
The picker options are:
- None
- 15 min
- 30 min
- 60 min
- 2 hrs
Data requested concerns:
- wind direction and force (wind gust)
- weather
- temperature and visibility
which are then used to make automatic events - similar to manual events created with the New event button.
These events are marked Weatherfetch.
The first request is sent approx. 5 minutes after start and after any change of frequency, and then after each specified amount of time (frequency), plus a little extra time.
Time evaluation occurs when plots are made, i.e. Weatherfetch needs motion!
Network or other request errors trigs an alarm, leaving a WEATHERFETCH PROBLEM msg in the Incidents log - but doesn't stop trying a next request.
All requests are on behalf of CoaSoft, i.e. your anonymity isn't compromised.
TrackSet: Weatherfetch sound Picker
For specifying kind of sound for each successful fetch of weatherdata during tracking.
The picker options are:
- None
- 1010
- 1021
- 1025
- 1029
- 1035
- 1036
- 1165
Unless set to None, a sound is heard each time a Weatherfetch request (and subsequent automatic event creation) is successfully done.
This can be useful for monitoring the feature. When you hear a selected sound, you may want to check the newest event - find it in the Eventlist or on the Map.
Maybe you want to supplement with data not supplied by the requests, i.e.:
- current direction and force
- waves
Or the Weatherfetch mark in the Text-note of the automatic event could be changed to something more meaningful?
Sound options don't conflict with options in the Tracking beep Picker or other sound options.
TrackSet: Anch. alarmzone rad. Picker
For specifying radius of alarmzone monitoring an Anchor activity.
The picker options are:
- 10m/33ft
- 20m/66ft
- 30m/98ft
- 40m/131ft
- 50m/164ft
- 75m/246ft
- 100m/328ft
When anchoring is started, the App monitors that your boat (i.e. device) stays within an alarmzone, to detect drifting.
Set or change radius of the alarmzone before or while anchoring.
IMPORTANT:
- when the activity is started, tap the Track mainpage button CurrMap to verify that monitoring starts correctly
- the GPS may consume a significant amount of battery power: your device should be connected to a power source
- your device must be in Ring mode to ensure the alarm sound may be heard
- test the activity thoroughly before trusting it!
TrackSet: AutoEnd timetrigger Picker
For specifying estimated max. time between plots, with the purpose of automatically ending tracking in case:
- you have moored, but after some time you cause extra plot(s) by moving around / going ashore
- and the usual ending procedure was forgotten or not done at arrival
Checkout Event editor: Truncate Track.
The picker options are:
- None
- 5 min/sog>1.30
- 10 min/sog>0.65
- 15 min/sog>0.43
Formulas:
- when tracking, plots are at most 200 meter apart (if following a straight line and making no events) - designate this max. distance D
- with a SOG of S, the time T to cover this distance is D / S
- when T exceeds the selected value, an AutoEnd timetrigger is executed
Example:
- assume your SOG is always > 0.65 kn *)
- therefore select the 10 min/sog>0.65 option
- timetrigger will execute when T exceeds:
- 200 m / 0.65 kn
- = 200 m / 0.65 * 1852.0 m / h
- = 10.0 minutes
*) Perceive always as mostly, as it's unlikely that your lowest SOG occurs on a section with maximum lenght (200 meter).
If the trigger executes, ending of tracking occurs automatic, leaving a AUTOEND TIMETRIGGER ACTIVE msg in the Incidents log.
If you are very careful with manually ending tracking, select the None option (factory default). You will then not experience very slow sailing inadvertently triggers an AutoEnd.
Unless the automatic LOCATION UPDATE PAUSED pauses.
On the other hand, if you often experience tracking continue after mooring, try some of the other options.
Be aware that if extra plot(s) - caused by post-mooring movements - occur too soon (compared to the selected timetrigger value), the AutoEnd feature will not work.
TrackSet: Copy earlier boardings on start Switch
Copies boardings of the newest item in History on start - provided such item:
- does exist
- has one or more boardings
Convenient for tracks in-a-row with same or persistent crew!
The switch applies to Make a track and Make a note activities only.
It cooperates with the action in the Crew+Boardings page.
TrackSet: Push Comments field on edit Switch
When ON: in the Track mainpage and in the Track / Note editor, if the Comments field is tapped, it pushes up (covering fields and items above) before opening the keyboard.
This makes the field larger than when the switch is OFF.
Also effects behaviour of the Tzones page, by (not) pushing up the big textfield of Tzones templates.
Best setting is a matter of taste, screen size and text extent.
TzoneGraphs Help pages
Are opened from the TzoneGraphs Options Menu - a tap on its action opens:
Micro TOC
TzoneGraphs: TzoneGraphs general
Purpose of page: to visually present Track zone usage.
It opens from the Tzones page when tapping its nav.bar button, and shows usage of the nine physical Tzones (z0-z8) in History.
The page top: gives total number of items and timerange from oldest departure time till newest arrival time (ignoring all filters). Exactly as the page top for the virtual Tzone (z9) in the Tzones page.
The page middle: has a switchable Volume Subview and Timeline Subview Volume and Timeline Subview (tap it to switch Subview).
The page bottom: shows distribution of total number of items into number of tracks (blue background) and number of notes (red background).
TzoneGraphs: Volume Subview
Displays a barchart with a bar for each of the nine physical Tzones (z0-z8), based on simple tallying.
Empty zones appear as flat bar - like an underscore.
Otherwise a bar represents:
- number of tracks (blue, lower part)
- number of notes (red, upper part)
TzoneGraphs: Timeline Subview
Displays a timeline chart with a set of lines for all physical Tzones (z0-z8):
- a long middle white dotted line
- a lower blue line representing timerange of tracks
- an upper red line representing timerange of notes
Empty zones appear as the white dotted line only.
Otherwise both a blue and a red line may appear.
A very short timerange is represented by a dot instead of a line.
A timeline doesn't reveal distribution or number of individual items in a Tzone.
I.e. two items with large temporal separation result in a long timeline.
Tzones Help pages
Are opened from the Tzones Options Menu - a tap on its action opens:
Micro TOC
Tzones: Tzones general
Purpose of page: to administers Track zone(s) for Tracking mainpage, History mainpage and Track editor.
It opens from:
| Page: | Action: |
|---|---|
| Track mainpage | (page title in the middle of the nav.bar, 'X' is a number |
| History mainpage | (page title in the middle of the nav.bar, 'X' is a number |
| Track / Note editor | Z button |
A track zone (aka Tzone) offers a division of tracks (and notes). Track zones may separate different activities, e.g.:
- driving
- hiking or biking
- sailing different ships
- making notes
Tracks and notes may be recorded in separate Tzones and / or mixed within same Tzone(s).
The Mix filter can separate these two types if mixed within same Tzone.
The App has nine physical Tzones, numbered zero to eight (z0-z8).
If you don't want to separate activities, stick with the Track mainpage default Tzone number zero (z0).
The History mainpage has a tenth virtual Tzone (z9) enabling browsing across all physical zones.
Selected Tzones appear in the:
- bottom tab bar - e.g. History z9
- top nav.bar, page title suffix - e.g.
- top nav.bar, back button - e.g.
Tzones: Tzones page content
The top navigation bar has the usual , and buttons. But also a nav.bar button to open the TzoneGraphs page.
Next, the Tzones page body has buttons:
| Button: | Action: |
|---|---|
| < and > | selects Tzone |
| Use | sets Tzone in opener and exits |
| Put+Use | copies template content first |
| Save | save template changes and stay (~ which exits) |
For Use and Put+Use to be enabled, template edits must be saved first.
Furthermore, Use is only enabled when opener is:
- a) Track mainpage or Track / Note editor, and a physical Tzone is selected, or:
- b) History mainpage and a non-empty Tzone is selected;
Only in situation a) will also Put+Use be enabled.
In situation b), all filters - except the selected Tzone - will be reset after Use .
Below these buttons follows information for the selected Tzone on its:
- # items (tracks + notes) in History
- oldest Dep and newest Arr time (ignoring all filters except Tzone)
- template content: two textfields
The Bottom of the page is constituted by a Tzone specific template.
Tzones: Openers of Tzones
Summarizing Tzones: Tzones general, the page opens from the:
- Track mainpage:
- to select a physical Tzone (0-8) and then before or while tracking:
- Use it as Tzone for tracking, or:
- Put+Use to 'put' Tzone template content into Track mainpage fields and then 'use' it
- to select a physical Tzone (0-8) and then before or while tracking:
- History mainpage:
- to select a non-empty Tzone (0-9) and then:
- Use it as Tzone for browsing ('put' doesn't apply to History)
- to select a non-empty Tzone (0-9) and then:
- Track / Note editor:
- to select a physical Tzone (0-8) and then while or after tracking:
- Use it to update Tzone, or:
- Put+Use to 'put' Tzone template content into track or note fields and then 'use' it
- to select a physical Tzone (0-8) and then while or after tracking:
Tzones: Tzones templates
A Tzone template is a placeholder for two textfields, layout of which matches the Track / Note fields Title and Comments.
Each of the nine physical Tzones (0-8) has an empty template after install.
One or more templates may be edited concurrently. Edits are saved either by the usual (closing Tzones page) or the Save button (page stays open).
Until saved, neither Use nor Put+Use buttons can be used.
Edit templates anytime, it's like using the Track editor. The button cancels.
The menu action is the opposite of the Put action, and 'gets' from Track mainpage or Track / Note fields, into template content for the selected Tzone.
It's disabled if selected Tzone is virtual z9, or opener is History mainpage.
The menu action is disabled for virtual z9.
Tzones: Track mainpage as clipboard
If you want to copy/paste the textfields from one Tzone template into another, try this from a passive Track mainpage:
- open Tzones
- browse to the Tzone to copy from
- tap Put+Use
- open Tzones again
- browse to the Tzone to paste into
- tap menu action
Edit (adapt) and tap Save or .
To cancel edits: tap the button.
This approach is an alternative to the standard iOS copy/paste procedures.
Voice Help pages
Are opened from the Voice Options Menu - a tap on its action opens:
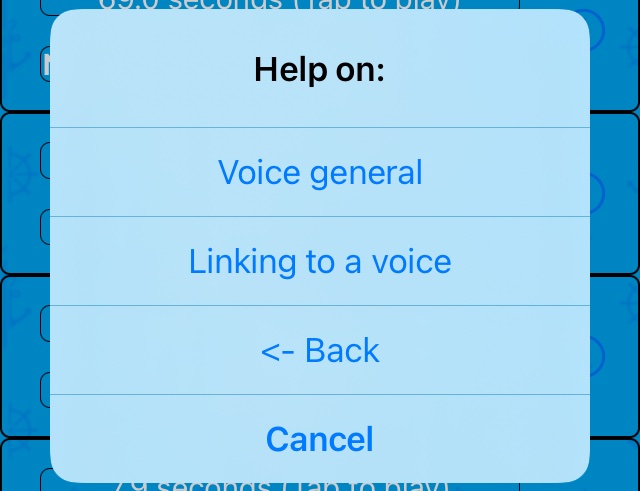
Micro TOC
Voice: Voice general
Purpose of page: to enable creation and management of voices recorded with the Microphone.
Handling voices and photos is very similar.
It opens from:
| Ref: | Page: | Action: |
|---|---|---|
| a) | Track mainpage | in Action on Current track? menu |
| b) | Tracklist | in Action on Historic track? menu |
| c) | History mainpage | in Action on Historic tracks? menu |
| d) | Event editor | in Photo Options submenu |
| e) | Photo | in Voice Options submenu |
c) and e) operates at group (multiple) tracks level (note the 's' in 'trackS'), the others at single track level.
In context of this App, a voice is an item recorded with the action in the Dictaphone page - requiring access to the Microphone.
Voices attach to a given track (or note) - just like events - and live in the App database (not as separate files).
In Group mode, is disabled. Items can be copied / moved to other tracks using Clipboard actions.
Items can be:
- assigned titles
- moved up / down (within same track)
- deleted (swipe to delete)
Voice(s) may be linked to photo(s) with the action. In the Voice page, the number of photos linking to a given voice, is shown next to its title.
Voice: Linking to a voice
Both photos and voices are added to specific tracks or notes. Both entities may be added in two ways:
- 1) from the Track mainpage buttons Shoot and Dictate when tracking or making notes
- 2) via the Photo and Voice pages, both opened from the and the menus
Both entities can be perceived and used independently. But in addition, you can create a link to a given voice from one or more photos.
1) When tracking an autolink feature may link the newest photo taken with the Shoot button to a voice recorded shortly after with the Dictate button.
2) Otherwise, its best to add the voice via the Voice page (2) with the action, and then via the Voice Clipboard (short: Clb) paste a link into the photo:
- in the Photo page, open the menu for a specific photo
- further, open the menu
- tap the action
This applies to both when tracking and when working in the history realm.
Links between tracks, photos and voices can be shown as (arrows go from superior -> inferior):
            +-------------+
            !    Track    !
            +-------------+
              !         !
              v         v
   +------------+     +------------+
   !   Photo    ! <-- !   Voice    !
   +------------+     +------------+
Read the diagram like:
- a track has zero or more voices added
- a track has zero or more photos added
- a voice can be linked to zero or more photos
- a photo has zero or one link to a voice
The optional link to voice in a photo may reference any voice - whether attached to the same or another track as the photo.
Throughout the manual, unless otherwise stated, the term track also covers note.
Sailor Logbook App manual - © Copyright 2018 CoaSoft LLC Denmark