Purpose of chapter: to describe how tracking starts.
Local TOC
Consider Track mainpage: 'Make a track' running Help a supplement.
START a tracking activity
When you have authorized the App to use the GPS, tap START a tracking activity a second time and select a tracking activity:

The primary activity is - and is therefore focus in this and most other chapters. Checkout Secondary activities for description of the other activity types:
- Resume last track
- Anchor
- Make a note
After tapping a tracking activity, you must confirm:

After confirming, the GPS warms up to fetch a first location (may take some time, depending on conditions and when the GPS was last used) and tracking starts:

The START a tracking activity button turns into a slowly blinking END activity tracking 'Make a track' button, and when the GPS is warmed up, the activity starts.
The message line turns green, and its text displays in italic font, which (like the slow blinking) indicates that the Track mainpage is active.
The small GPS active icon (at the top of the screen, next to the battery icon) is now turned on.
If this doesn't happen and no next screen appears, you could be trying to track on an iPad without GPS (without cellular option).
When warming up, tap the END activity... button if you didn't mean to 'Make a track'.
Track mainpage when running
When the GPS is warmed up, and a first position - plot number 1 - has been captured, the screen displays as:
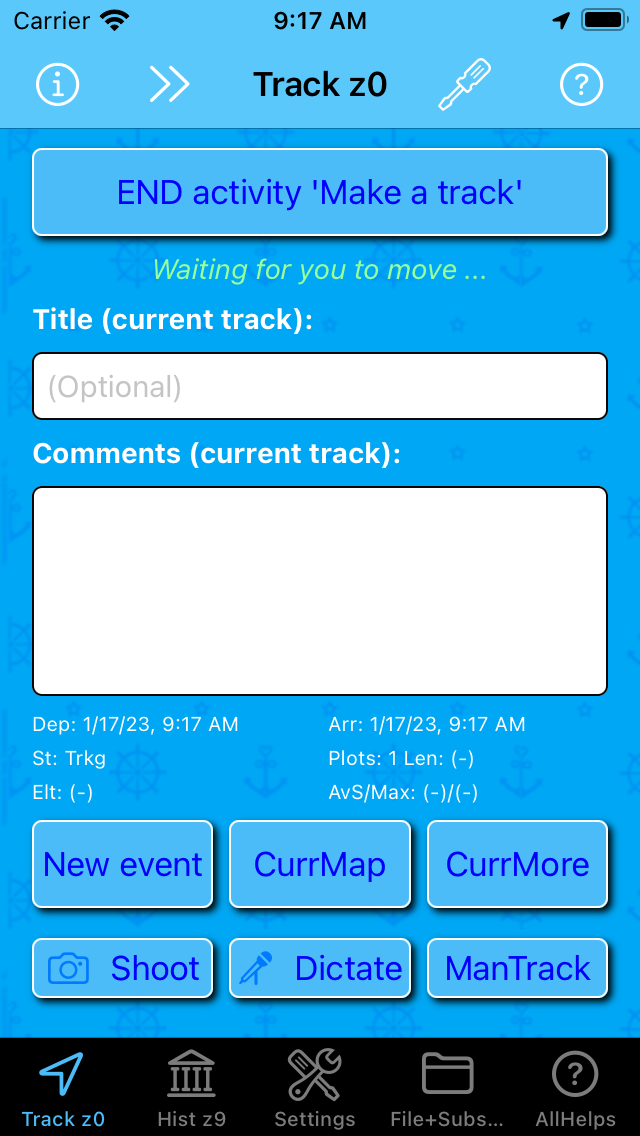
Above, all buttons are active: they have a shadow effect.
and the App is Waiting for you to move... before a next plot is made - whereafter the progress is seen.
The two textfields can be left blank or be filled in before, during or after tracking.
Their labels are changed from ... (next track) to ... (current track).
Now that tracking is started, all six buttons at the bottom are enabled:
| Button | Opens |
|---|---|
| New event | Event editor |
| CurrMap | Map |
| CurrMore | Action on current track menu (with More actions) |
| Shoot | Shoot |
| Dictate | Dictaphone in direct mode |
| ManTrack | ManTrack (always enabled) |
Button one and two represent functions more essential than those hidden in the third button (representing a menu), and are thus directly accessible.
Other direct access ways are Shortcuts, which you'll get to know later.
The Shoot button localizes photos while tracking (giving yellow eventpins in the Map page), and is a companion to the Photo Options Menu action: Add from Cameraroll action.
The Dictate button likewise localizes voices while tracking (also giving yellow eventpins in the Map page), and is a companion to the Voice Options Menu action: Add from Dictaphone action.
Action on current track menu
When tapping CurrMore shortly after start of tracking, this menu pops up:

Disabled actions are dimmed - usually a short explanation for disabling, is shown in paranthesis.
After a few plots all actions are enabled::

The menu actions are links to:
| Subpage |
|---|
| Track editor |
| Eventlist |
| Barchart |
| Piechart |
| Crew+Boardings |
| Photo |
| Voice |
Checkout Menu comparison.
Tracking in progress
If not done already, the textfields can be filled in now, for example starting with the title:
Tapping the Comments field pushes it up to make more space:
Above, the TrackSet: Push Comments field on edit Switch is ON. Setting the switch OFF gives another screen:
Tapping outside a textfield dismisses the keyboard, and a full screen appears:

Some so far statistics are displayed:
| Promt | Meaning / remark |
|---|---|
| Dep | Departure time, i.e. the time you started tracking |
| Arr | Arrival time, i.e. the time the last plot was done |
| St | State of the track (here: 'Trkg', i.e. Tracking / being tracked) |
| Plots | Number of plots |
| Len | Tracklength |
| Elt | Elapsed Time, i.e. time from departure to current time / arrival |
| AvS | Average speed between first and last plot |
| Max | Maximal speed from GPS since start |
Tracklength is shown in meter during the first 1000 meter - thereafter it's shown in Nautical Miles (nm) by default.
Sailor Logbook App manual - © Copyright 2018 CoaSoft LLC Denmark